Stage 9: Edit in iMovie
Make sure you've finished Stage 8: Publish & Playtest Party and have a few short clips saved.
an edited gameplay video with a title and a thumbnail
how trimming, sound, and titles turn clips into a video
a finished video, ready to post
These are the Studio-stage tools. Open in a new tab so the course stays open in this one. Ask a coach before you sign in to anything.
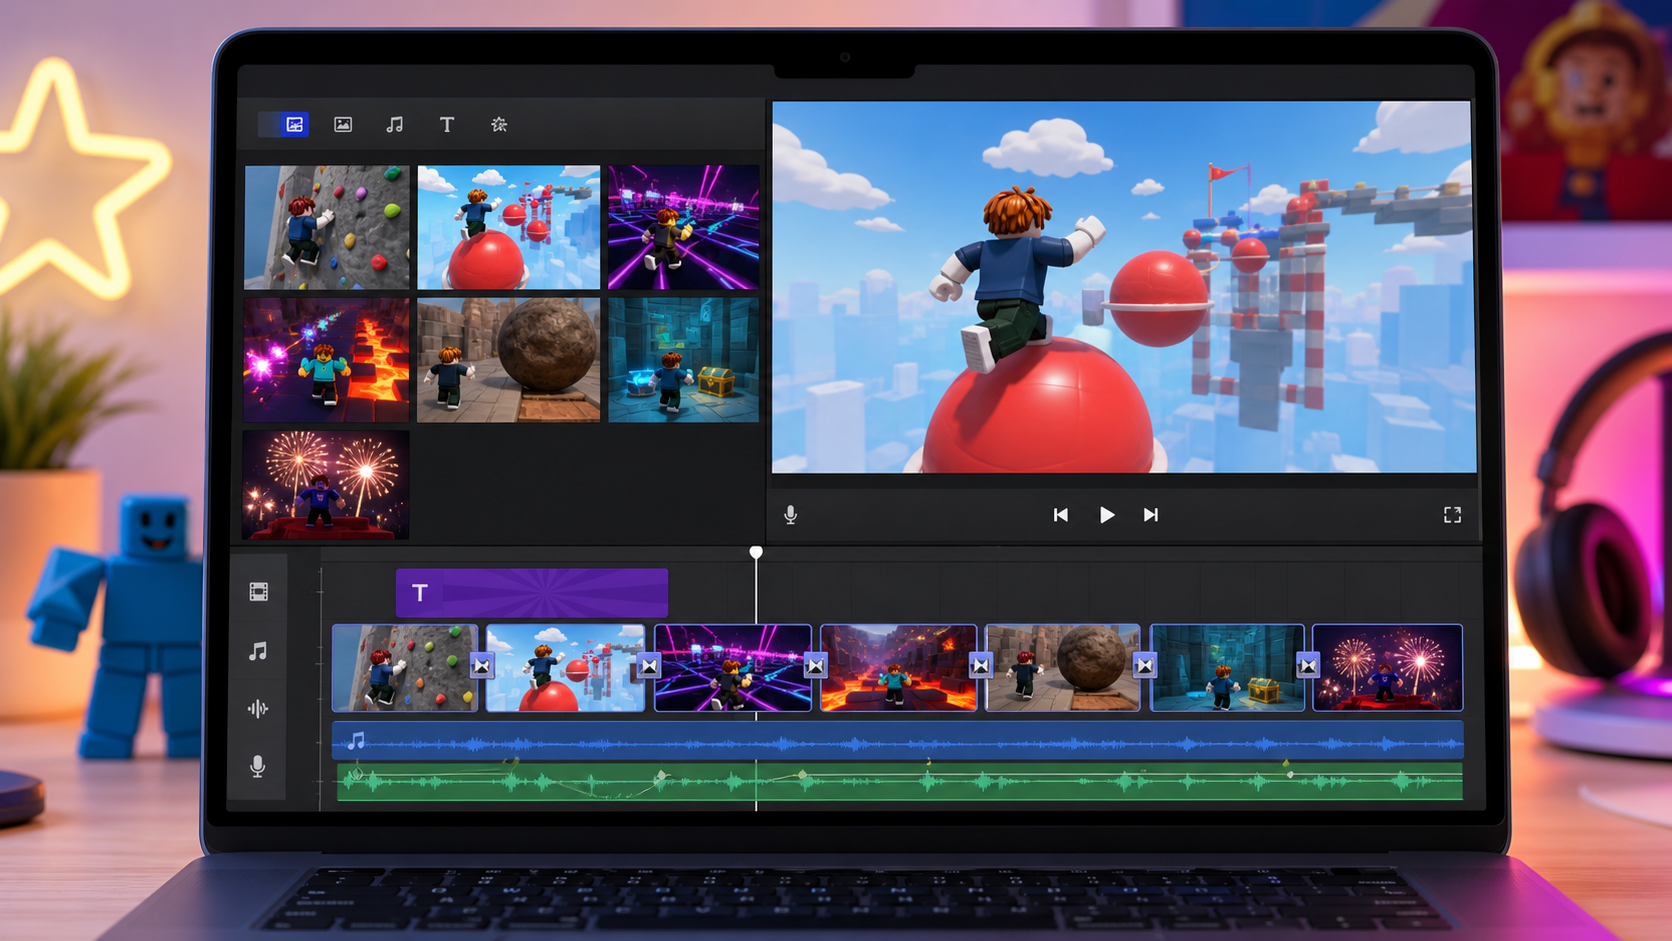
Preview the iMovie studio: trim stage clips, add sound, drop a title card, and design a thumbnail.
Build this stage belowThe big idea
Raw clips aren't a video yet. A real YouTuber's secret is editing: cutting out the boring parts, putting the best moments in a good order, and adding a title and sound so it feels finished. The difference between "some recordings" and "a video people watch" is the editing.
Today you'll edit in iMovie on your Mac. The skills you learn — trim, arrange, add sound, add a title, export — work in any editor, but iMovie is the Mac tool we'll use in camp.
Open iMovie on the projector and build a 20-second example video while campers watch:
- Import two clips, drag them to the timeline.
- Trim the dead air off the front of each.
- Drop a title card ("My Obby!") at the start.
- Add one sound effect or music bed underneath.
- Export and play it back. Narrate each click. Then let them build their own.
Build it
Step 1 — Open iMovie and import your clips
- Open iMovie from Applications, Launchpad, or Spotlight search.
- Click Create New → Movie.
- Click Import Media and choose your clips from the Roblox YouTuber Clips folder.
- Your clips appear in the media panel.
Step 2 — Build your timeline
- Drag your favorite clip down to the timeline at the bottom.
- Drag the others after it, in the order you want them to play.
- Put your strongest moment near the start — viewers decide in the first few seconds whether to keep watching.
- Aim for 60-120 seconds total. That is long enough to show the full obby, but short enough to stay exciting.
Step 3 — Trim the boring parts
A good video is mostly cutting. In iMovie, drag the edge of a clip inward to trim it.
- Cut the dead air at the start and end of each clip.
- Keep the action: the run-up, the near-miss, the reaction.
- Shorter is almost always better. A tight 60-120 seconds beats a sleepy three minutes.
Step 4 — Add a title card
- Click Titles and pick a simple title style.
- Drag it to the start of your timeline.
- Type your game name (from Setup!) — like "Can You Beat My Obby?!"
- Drop short captions on big moments too: "SO CLOSE", "watch this", "FINALLY".
Step 5 — Add sound
- Click Audio & Video or Audio, then pick a sound effect or music track that is already on the Mac. Drag it under your clips.
- Lower the music volume so you can still hear the game and any commentary.
- Add a sound effect on a key moment — a whoosh on a jump, a ding on the finish, or a sting when the boulder hits.
Step 6 — Export your video
- Click the Share button (top right) → Export File.
- Pick 1080p if it is available, then save the
.mp4to your Roblox YouTuber Clips folder. - Keep it somewhere safe — you'll post it in Stage 10.
Step 7 — Design a thumbnail
The thumbnail is the picture people click on. It matters as much as the video.
- Pause your video on the most exciting frame and press Shift + Command + 4, then drag around the preview area to save a screenshot.
- Make a simple thumbnail in Keynote, Pages, or any coach-approved image tool. Add big bold text — three or four words max: "INSANE OBBY!"
- Use bright colors and a clear, surprised, or excited face/character if you have one.
- A great thumbnail is readable at tiny size. Squint at it — can you still read it? Then it works.
Watch your video back and pretend you're a stranger scrolling. In the first 3 seconds, is something happening? If it opens with quiet walking, trim it. Open on the gasp.
Understand it
Editing is mostly deleting. New creators think editing means adding effects. Pros know it means cutting — removing everything that isn't the good part. A tight video respects the viewer's time, and respected viewers come back.
Order is a choice. The same clips feel completely different depending on what comes first. Lead with your best moment (the "hook"), build to the finish, end on the fireworks. You're not just showing what happened — you're telling a little story.
Sound carries emotion. Music sets the mood; a well-placed sound effect makes a moment land. That's why we layered audio on top of the gameplay — the picture shows what happened, the sound tells you how to feel about it.
The thumbnail is the real first impression. More people see your thumbnail than your video. Big readable text, bright colors, one clear idea. It's a tiny poster for your show.
Try this
Try this
Three short experiments. Predict before you run, then test your guess.
Before you trim, guess how long your finished video will be. After editing, check — most first videos end up much shorter than the clips you started with. Were you surprised?
Watch your video once with music and once muted. How much does the music change how it feels? Which moments does it lift?
Your thumbnail and your title work together. Look at both — do they promise the same exciting thing? If a stranger saw only those two, would they click?
Test your stage
Before moving on:
- Your clips are trimmed — no long boring stretches.
- Your best moment is near the start.
- There's a title card with your game name.
- There's music or at least one sound effect, turned down so the gameplay still matters.
- You exported an
.mp4and can play it back. - You made a thumbnail with big, readable text.
- Creator check. Does the first 3 seconds make you want to keep watching?
If it breaks
- iMovie won't import my clip. Make sure you're pointing at the Roblox YouTuber Clips folder and the file is a video file. If a recording saved somewhere else, search Finder for today's date or drag the clip into the folder first.
- My trim cut the wrong part. Press Command+Z to undo, or drag the clip edge back out — trimming is never permanent until you export.
- The music is louder than the game. Click the music track and lower its volume so the gameplay still comes through.
- Export is taking forever. Long, high-resolution videos take time. A 1080p video around one minute should be quick — if it is stuck, a shorter video exports faster.
- My thumbnail text is hard to read. Make it bigger, fewer words, and add an outline or a solid color behind it. Squint-test it.
Editing is where 7–10 year-olds get the most stuck and the most delighted. A few pointers:
- Trimming is the lesson. Many kids want to add effects before they cut. Get everyone to trim first — "delete the boring parts" is a concept they can feel.
- Expect "my whole clip is gone!" panic — show them Command+Z early and often.
- Cap the length. Set a target of 60-120 seconds so no one tries to use every second of footage.
- Save the thumbnail for kids who finish early — it's a fun, lower-stakes creative task that keeps fast finishers busy.
- One shared, simple music track for the room avoids 20 kids hunting for the perfect song.