Stage 4: Fireball Footpath & Hidden Hazard Field
Make sure you've finished Stage 3: KillBrick Path.
a fireball cannon path and a hidden-hazard field
how timing and hiding both make players slow down
two new danger zones, each with a checkpoint
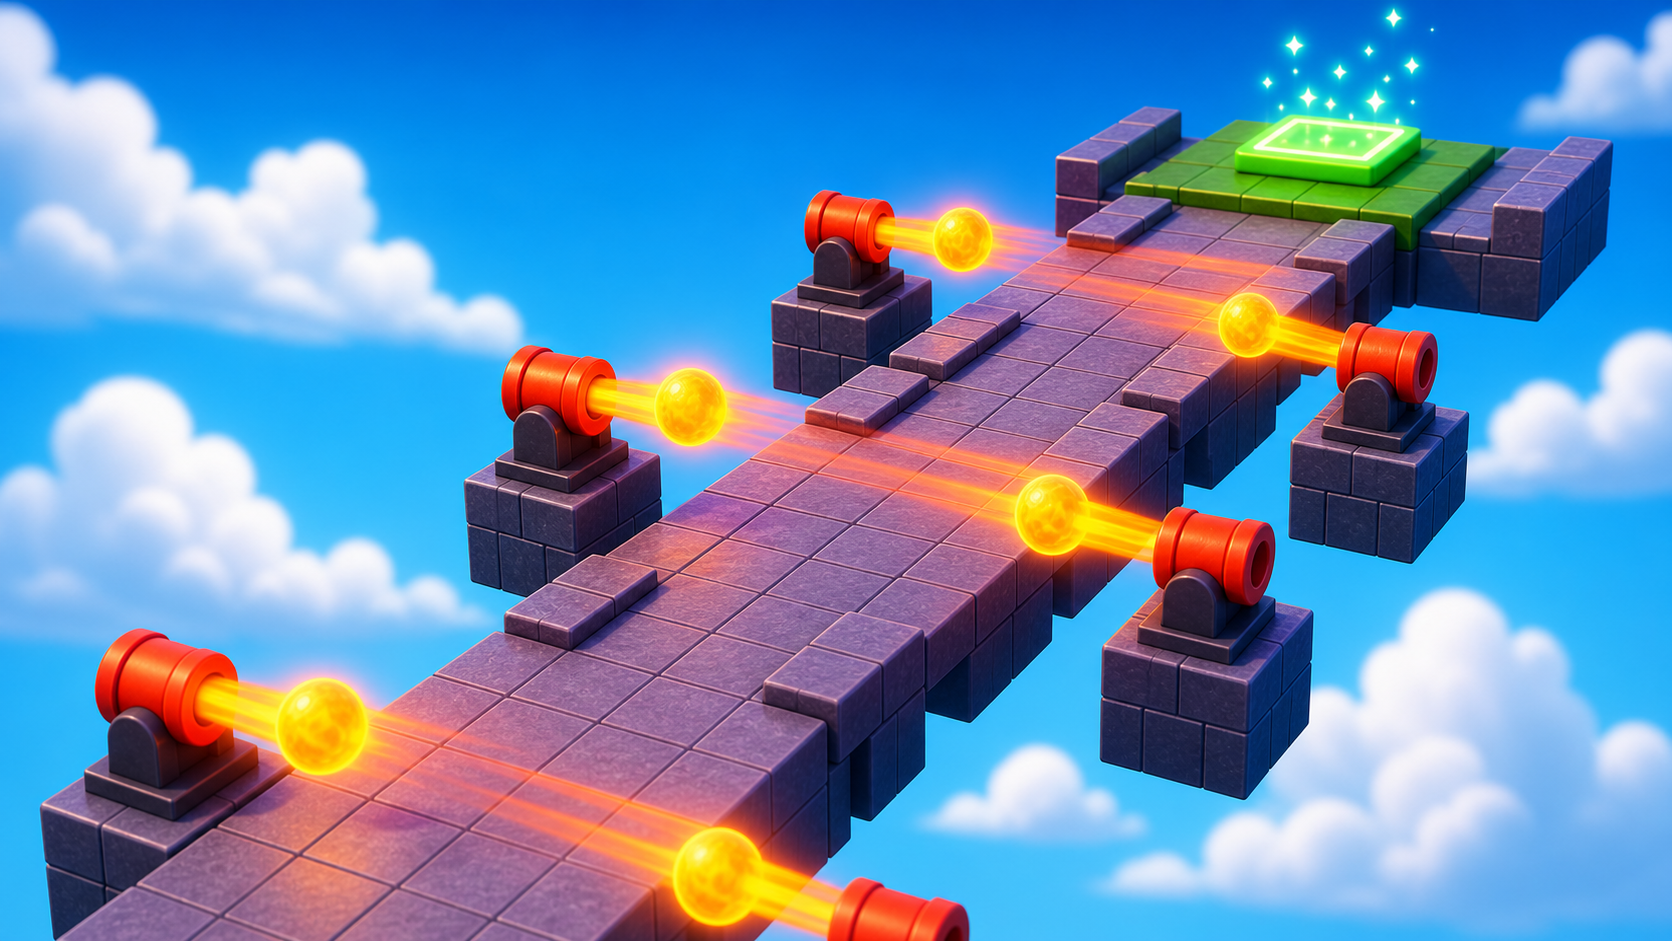
Preview the fireball footpath and the hidden hazard field that follows it.
Build this stage belowThe big idea
Stage 3's KillBricks never moved. Today's two obstacles add danger you have to read.
First, fireballs that fly across a narrow path — the danger isn't where it is, it's when it's there. The player has to watch the pattern, then dash. Then a hidden hazard field: tiles that blend into the floor so the player has to look closely before moving. The lesson is timing and hiding both make the player slow down — and a player slowing down, then nailing the run, is exactly the moment that makes a great clip.
Stage 4 clip target: In Stage 8, capture either a perfect fireball dodge or the hidden-field surprise. The clip should make a viewer think, "Wait, how did they survive that?"
Build it
Step 1 — Build the fireball path
A long narrow path that forces the player to time their crossing.

Build this partCannonPath
BlockOpen recipe
CannonPath
Block- Size
- 4 × 1 × 30
- Color
- Dark stone grey
- Material
- Slate
- Anchored
- ✓ Yes
- Place
- Right in front of the Stage 5 checkpoint, stretching forward 30 studs
4 studs wide — just enough to walk, not enough to dodge sideways. That's the point.
Step 2 — Build a cannon
A cannon is two parts: a flat round base and a tube-shaped barrel that aims across the path.
Build this partCannonBase
CylinderOpen recipe
CannonBase
Cylinder- Size
- 2 × 3 × 3
- Color
- Black
- Material
- Metal
- Anchored
- ✓ Yes
- Place
- Beside the path, about halfway along, sitting on the ground
When Shape is Cylinder, the X size is the cylinder's length (so it lies flat). Y and Z are its diameter.
Build this partCannonBarrel
CylinderOpen recipe
CannonBarrel
Cylinder- Size
- 5 × 1.5 × 1.5
- Color
- Dark stone grey
- Material
- Metal
- Anchored
- ✓ Yes
- Place
- On top of CannonBase, rotated so it points across the path
In Properties → Orientation, try `[0, 90, 0]` to aim across the path. The tip is where fireballs come from.
Step 3 — Add the script that fires fireballs
Right-click CannonBarrel → Insert Object → Script. Delete the placeholder code.
CannonBarrel
The Script goes inside CannonBarrel (not CannonBase). The barrel decides where fireballs come from.
local barrel = script.Parent
local Debris = game:GetService("Debris")

local function spawnFireball()
  local fireball = Instance.new("Part")
  fireball.Shape = Enum.PartType.Ball
  fireball.Size = Vector3.new(2, 2, 2)
  fireball.Color = Color3.fromRGB(255, 100, 0)
  fireball.Material = Enum.Material.Neon
  fireball.Position = barrel.Position

  local velocity = Instance.new("BodyVelocity")
  velocity.Velocity = barrel.CFrame.LookVector * 40
  velocity.MaxForce = Vector3.new(40000, 40000, 40000)
  velocity.Parent = fireball

  fireball.Touched:Connect(function(otherPart)
    local character = otherPart.Parent
    local humanoid = character:FindFirstChildOfClass("Humanoid")
    if humanoid then
      humanoid.Health = 0
    end
    fireball:Destroy()
  end)

  fireball.Parent = workspace
  Debris:AddItem(fireball, 3)
end

while true do
  spawnFireball()
  wait(1.5)
end
Press ▶ Play. A glowing fireball shoots out every 1.5 seconds. Touch one and you respawn.
The wait(1.5) at the bottom is the rhythm — change it to fire faster or slower. Make a second cannon by duplicating CannonBase and CannonBarrel (drag the Script onto the new barrel), and set its wait to 1.7 so the two drift in and out of sync.
Step 4 — Add the fireball checkpoint
The Stage 6 checkpoint goes at the end of the fireball path. This is the sixth checkpoint.
4.1 Add another SpawnLocation
Right-click Workspace → Insert Object → SpawnLocation.
4.2 Set its properties
- BrickColor → a new color.
- AllowTeamChangeOnTouch → checked.
- Neutral → unchecked.
- TeamColor → matches the BrickColor.
4.3 Tag it with its stage number
In Attributes, add a StageNumber attribute (number type) and set its value to 6.
4.4 Add a Team
- In Teams, insert a new Team named Stage 6.
- Uncheck AutoAssignable.
- Set TeamColor to match.
Drag the SpawnLocation onto the end of your fireball path.
Step 5 — Build the hidden hazard field
Now switch from timing to looking. A wide field with tiles that blend into the floor.
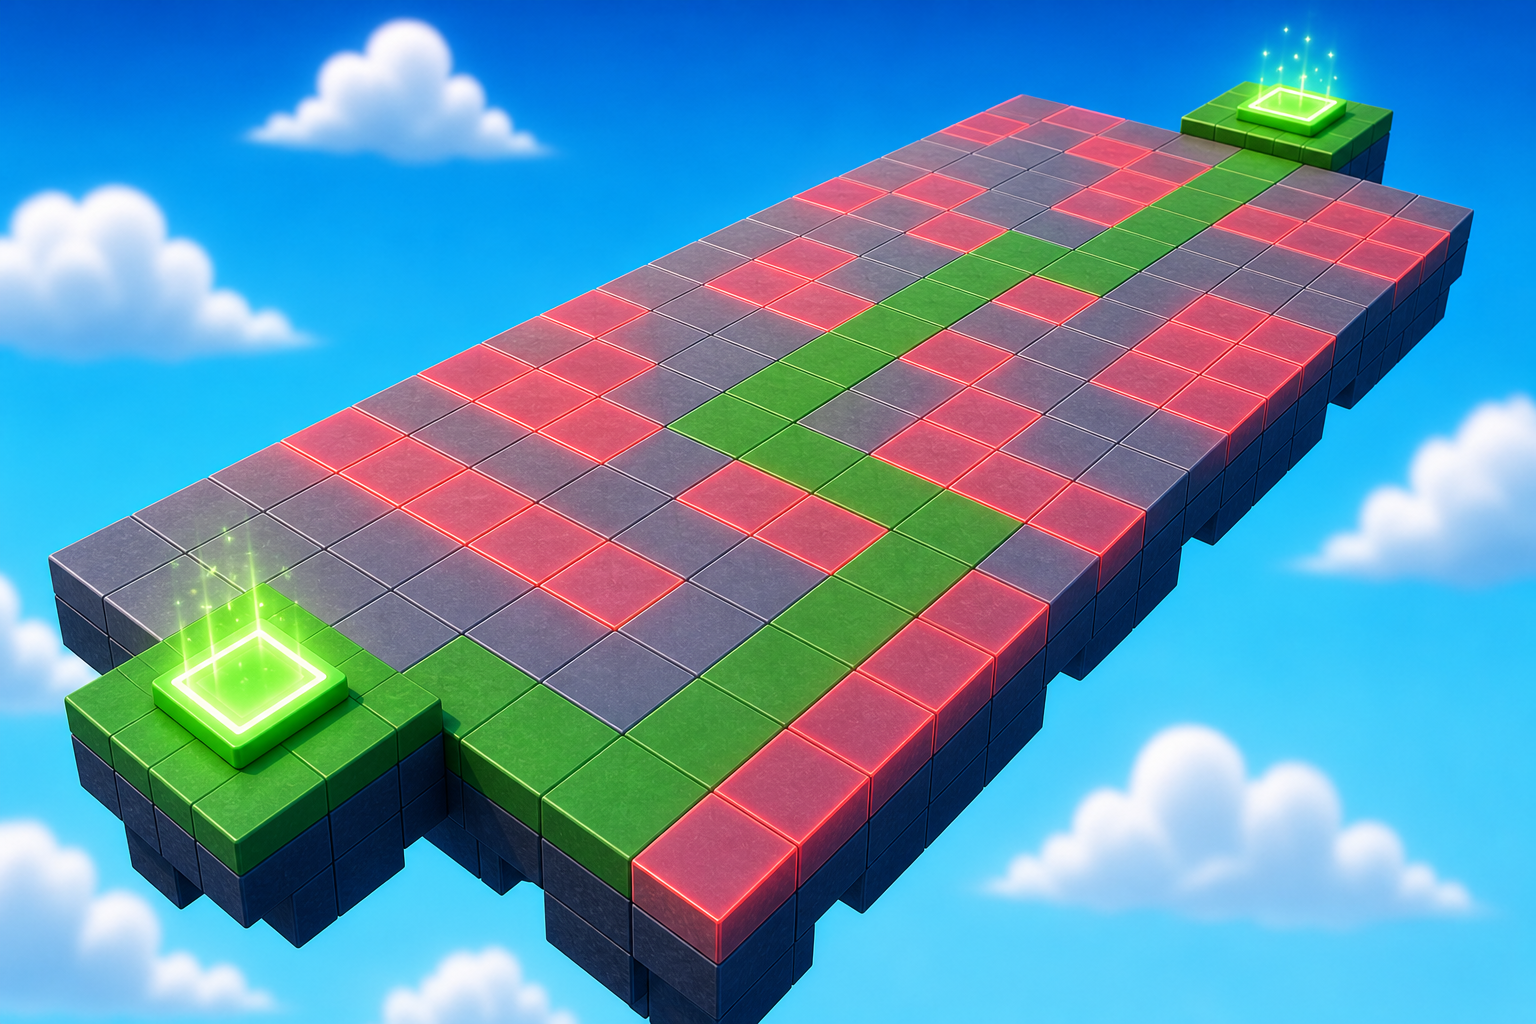
Build this partHazardField
BlockOpen recipe
HazardField
Block- Size
- 20 × 1 × 30
- Color
- Sand stone
- Material
- Sand
- Anchored
- ✓ Yes
- Place
- Right in front of the Stage 6 checkpoint, stretching forward 30 studs
A patchy texture like sand helps hide the hazards in visual noise.
Build this partHazard_1
BlockOpen recipe
Hazard_1
Block- Size
- 3 × 0.2 × 3
- Color
- Sand stone
- Material
- Sand
- Anchored
- ✓ Yes
- Place
- On HazardField, somewhere in the middle area
Same color and material as the field so it blends in. The script sets Transparency = 0.85 so it's faintly visible — fair, not invisible.
Step 6 — Add the script that makes the tile dangerous
Right-click Hazard_1 → Insert Object → Script. Delete the placeholder.
Hazard_1
The Script lives inside Hazard_1. It sets the hazard's transparency for you.
local hazard = script.Parent

-- Faint enough to be risky, visible enough to be fair
hazard.Transparency = 0.85

hazard.Touched:Connect(function(otherPart)
  local character = otherPart.Parent
  local humanoid = character:FindFirstChildOfClass("Humanoid")
  if humanoid then
    humanoid.Health = 0
  end
end)
Press ▶ Play. Hazard_1 is faintly visible. Step on it — you respawn at the Stage 6 checkpoint.
Click Hazard_1, press Ctrl+D four or five times, and drag the Script onto each duplicate. Scatter them across the field — but leave at least one safe route a careful player could walk. Press ▶ Play and walk slowly. Read the field before you move.
Step 7 — Add the hidden-field checkpoint
The Stage 7 checkpoint goes at the far side of the field. This is the seventh checkpoint.
7.1 Add another SpawnLocation
Right-click Workspace → Insert Object → SpawnLocation.
7.2 Set its properties
- BrickColor → a new color.
- AllowTeamChangeOnTouch → checked.
- Neutral → unchecked.
- TeamColor → matches the BrickColor.
7.3 Tag it with its stage number
In Attributes, add a StageNumber attribute (number type) and set its value to 7.
7.4 Add a Team
- In Teams, insert a new Team named Stage 7.
- Uncheck AutoAssignable.
- Set TeamColor to match.
Drag the SpawnLocation onto the far side of your field.
Understand it
A timing hazard asks a different question than a static one. Stage 3's KillBricks asked "can you walk around me?" — a space question. Today's fireballs ask "can you walk past me at the right moment?" — a time question. The gaps between fireballs are where the game is fun, so two cannons on alternating beats feel like a rhythm, while two firing at once feel unfair.
A hidden hazard lives in the gap between "invisible" and "almost invisible." Transparency = 0.85 is the sweet spot: the player who looks will spot it, the player who rushes will pay. Set it to 1.0 and it's a cheap trick; set it to 0.5 and everyone sees it. Fairness and difficulty are the same dial — you tune them together.
Both obstacles work because they make the player slow down and pay attention. That pause — watch, then move — is the heartbeat that separates a chase from a puzzle, and it's what makes a viewer lean in.
Try this
Try this
Three short experiments. Predict before you run, then test your guess.
Place two cannons right next to each other, both aimed across the path. Predict whether the player will ever get a safe window. Try it — what did you learn about cannon spacing?
Walk the hidden field once fast without looking, then once slow and watching. How different are the two runs?
A timed hazard and a hidden hazard both make players careful, but in different ways. Which one do you think makes a more surprising clip when you record a friend playing — the dramatic dodge, or the "I didn't see that coming"?
Test your stage
Before moving on:
- Press ▶ Play and start from the Stage 5 checkpoint.
- Watch the fireball pattern, then cross without getting hit.
- On the hidden field, try one unsafe route, then find a safe path across.
- Touch each new checkpoint, reset, and confirm you respawn at the right one.
- Design check. Is there always a gap in the fireballs, and at least one safe route across the field?
If it breaks
- The cannon doesn't fire. The Script must be inside CannonBarrel (not CannonBase, not Workspace). Check Explorer.
- The fireball drops instead of flying. The BodyVelocity's MaxForce is too low. Re-check
MaxForce = Vector3.new(40000, 40000, 40000). - Fireballs come out the wrong way. Click CannonBarrel and try Orientation
[0, 90, 0],[0, -90, 0], or[0, 180, 0]. - Players can see every hidden hazard plainly. Transparency is too low. Use
0.85. - Players can't see any hazards at all. Transparency is too high (close to
1.0). Drop it to0.85. - A new checkpoint sends me to the wrong stage. Color mismatch — BrickColor, TeamColor, and the Team's TeamColor must all match.