Stage 1: Ascending Walls
Make sure you've done the Setup page first — that's where we get Roblox Studio ready, open a fresh project, and name your channel.
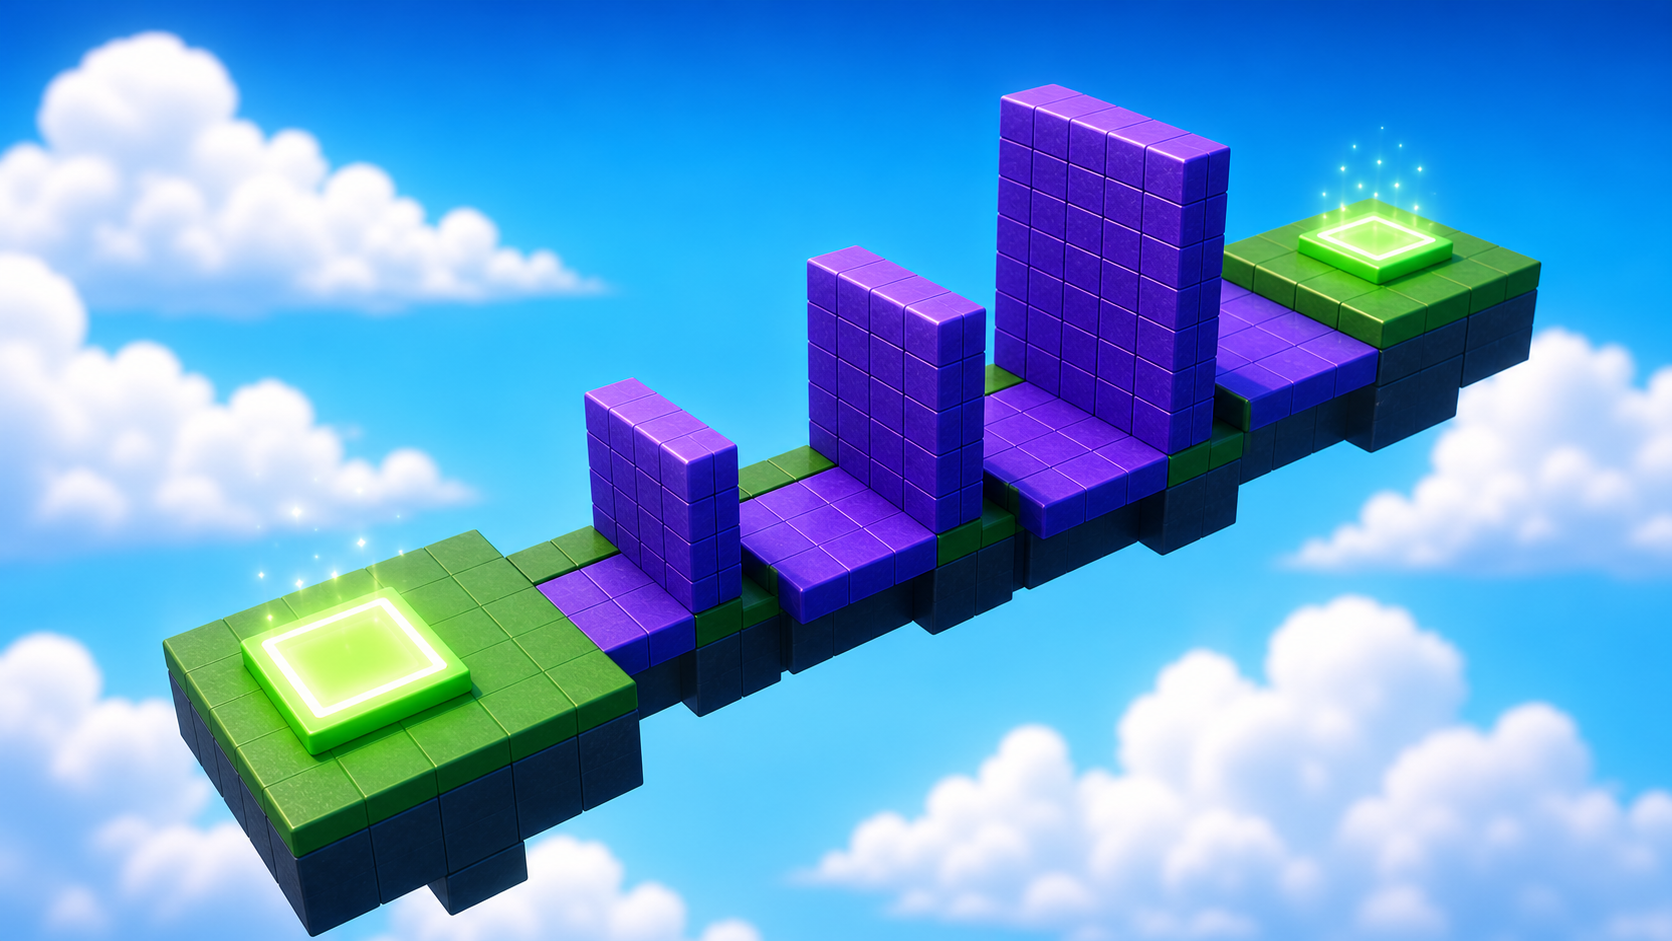
a checkpoint climb with three rising wall blocks
how checkpoint Teams and part sizing work together
a playable first obstacle, themed to match your channel

Preview the first checkpoint climb: three rising wall blocks leading players to Stage 2.
Build this stage belowThe big idea
Every obby is really a chain of checkpoints. A checkpoint is a save spot in your game — if a player falls or runs into something dangerous, they come back to the last checkpoint they touched.
Today we build the very first checkpoint pair: the spot where players spawn at the start, and the spot they reach after climbing your first obstacle. Once you know how a checkpoint works, you can use the same pattern in every later stage — just with a new color, a new name, and a new obstacle in between.
The obstacle today is a climbing wall: three blocks that get taller and taller. The blocks don't need any code — Roblox already lets characters jump and stand on parts. What we are setting up (without writing scripts) is the connection between the wall and the checkpoints.
And because you're a creator, there's one more job today: make it look like your game. The colors you pick now are the colors people will see in your video later.
Build it
Step 1 — Set the first checkpoint
Every stage starts with a checkpoint. Roblox already gave us one when we made a new place — it's called a SpawnLocation (the green pad you can see in the Workspace). It works, but it's set up for any player on any team. We need to lock it to our first team so it counts as the Stage 1 spawn.
1.1 Find the SpawnLocation
In the Explorer panel on the right, click SpawnLocation to select it.
1.2 Set its properties
Open the Properties panel (below Explorer) and change these:
- BrickColor → pick any color you like. This is the color of your checkpoint.
- AllowTeamChangeOnTouch → check this box. It means when a player touches the pad, they join the matching team.
- Neutral → uncheck this. It tells Roblox that this pad belongs to a specific team, not everyone.
- TeamColor → set it to the same color as BrickColor.
1.3 Tag the SpawnLocation with its stage number
An attribute is a little label you can stick on any part — a name and a value. We'll give every SpawnLocation in this obby a StageNumber attribute so future scripts know which checkpoint is which.
- With the SpawnLocation still selected, scroll the Properties panel all the way down to find the Attributes section.
- Click the small + (Add Attribute).
- Name:
StageNumber. Type:number. Value:1. - Click Save.
You'll see StageNumber 1 listed under Attributes. This is the only place we'll do all that typing — every later checkpoint reuses the same name, just with a different number.
1.4 Add a Team
We need a Team to match the SpawnLocation. A Team is a group of players. We use one team per stage so Roblox knows where to respawn each player.
- In Explorer, find the Teams folder.
- Right-click it → Insert Object → Team.
- Click the new Team and rename it to Stage 1.
- Set its TeamColor to the same color as your SpawnLocation.
That's the first checkpoint done.
Step 2 — Build the climbing wall
Now the fun part — the actual obstacle. Three blocks of different heights form a staircase players have to jump up.
2.1 Make three blocks
In the Workspace, click + → Part three times. You should now have three blocks sitting in the Workspace.
2.2 Color them in — on theme
Click each block and use the Properties panel to set a BrickColor and Material. This is where being a creator starts: pick colors that match your channel's look. A neon space theme, a candy theme, a lava theme — choose one and stick with it all week.
2.3 Make them grow taller
Each block needs to be a different height so they form a staircase. Click each block, then in Properties find Size and set:
- Block 1:
[4, 5, 2]— short - Block 2:
[4, 7, 2]— medium - Block 3:
[4, 10, 2]— tall
The middle number is the height. Bigger middle number = taller block.
2.4 Line them up
Drag the blocks so they sit side by side, with the shortest one closest to your SpawnLocation. That's your staircase!
Press ▶ Play in Studio and try to jump up. If your character can hop from block to block all the way up, the obstacle works.
You just built your first obstacle. That same trick — making blocks of different sizes — is what we'll use for almost every stage.
Right now you can't record yet (your game isn't published — that's Stage 8). But start thinking like a creator: this little climb is your game's opening shot. Is it bright? Does it pop? If a viewer saw this first, would they keep watching? Tune the colors until the answer is yes.
Stage 1 clip target: In Stage 8, capture a 5-8 second opening clip that shows a player leaving the Start Platform, climbing the three walls, and landing on the Stage 2 checkpoint.
Step 3 — Add the second checkpoint
Players who make it to the top need somewhere to land. The Stage 2 checkpoint goes at the top of your climb — that way reaching it feels like a win.
3.1 Add another SpawnLocation
In Explorer, right-click Workspace → Insert Object → SpawnLocation. A new green pad will appear.
3.2 Set its properties
Same as before, but with a different color:
- BrickColor → a different color this time.
- AllowTeamChangeOnTouch → checked.
- Neutral → unchecked.
- TeamColor → matches the new BrickColor.
3.3 Tag it with its stage number
Same gesture as before. In the Attributes section of Properties, add a StageNumber attribute (number type) and set its value to 2.
3.4 Add a Team
- In Teams, insert another Team and name it Stage 2.
- Uncheck AutoAssignable — only Stage 1 should be the team players start on. Stage 2 is for players who've already reached it.
- Set TeamColor to match the new SpawnLocation.
Drag the new SpawnLocation onto the top of your tallest block. That's where players will respawn after climbing the wall.
Understand it
A SpawnLocation + Team pair is the smallest possible "save point" in Roblox. Without them, a player who falls would respawn at a random spot — or get stuck. By naming each pair (Stage 1, Stage 2, Stage 3...) and matching colors between the pad and the team, Roblox handles the bookkeeping: "this player belongs to the team that owns the pad they last touched." You'll use this same pattern in every stage from here on.
The graduated block heights are a design choice. We could have made one tall wall — but jumping straight up is harder to read than jumping up and forward. Three growing blocks give the player a visible path. Pros call this legible difficulty: the player can see the route before they try it. Legible difficulty also reads well on camera — viewers can tell what's happening.
We uncheck AutoAssignable on every team after Stage 1. AutoAssignable means "new players can start on this team." If we left it on for Stage 2, new players might spawn at the top of the climb without doing the climb. The whole point of an obby is the player has to earn each checkpoint.
Try this
Try this
Three short experiments. Predict before you run, then test your guess.
What happens if Block 1 is the tallest and Block 3 is the shortest? Try it. Is your staircase still a staircase, or is it impossible to climb?
Build a second wall right next to the first one with smaller blocks — [3, 3, 2], [3, 5, 2], [3, 7, 2]. Walk both. Which version is harder to climb, and why?
Think ahead to your video. Of everything you built today — the checkpoint colors, the block heights, the theme — which one will a viewer notice first when they watch your clip?
Test your stage
Before moving on:
- Press ▶ Play and start from the first SpawnLocation.
- Climb all three wall blocks without using the editor to help.
- Touch the Stage 2 checkpoint, then reset your character and make sure you respawn there.
- Ask a Code Coach to confirm your SpawnLocation and Team colors match.
- Design check. Does your climb look like your channel — bright, themed, worth watching?
If it breaks
- My character respawns at the wrong checkpoint. Almost always a color mismatch. Open the SpawnLocation, check BrickColor and TeamColor. Open the matching Team, check its TeamColor. All three must be identical.
- Players keep spawning on Stage 2 from the start. AutoAssignable is probably still checked on the Stage 2 team. Open the Stage 2 Team in Explorer and uncheck AutoAssignable. Stage 1 should be the only Auto-assignable team.
- The new SpawnLocation falls when I press Play. SpawnLocations are not anchored by default in some Studio versions. Click the SpawnLocation, find Anchored in Properties, and check it.
- My character can't jump up the tallest block. Roblox characters can jump about 7 studs by default. If your tallest block is over 10 studs tall, that's the issue — drop Block 3 to
[4, 8, 2]or place it slightly behind Block 2 so the player has a running start. - The blocks look fine but my character falls through them. CanCollide is probably unchecked. Click the block, find CanCollide in Properties, and check it.