Stage 8: Publish & Playtest Party
Make sure you've finished Stage 7: Puzzle Room & Finish Line. Your obby should be complete and saved.
a published game and recorded gameplay footage
how to publish a Roblox game and record it safely
video clips of real players running your obby
These are the Studio-stage tools. Open in a new tab so the course stays open in this one. Ask a coach before you sign in to anything.
Preview the publish-and-playtest party: ship your game, swap with friends, and record short Mac gameplay clips.
Build this stage belowThe big idea
Until now, only you could play your obby. Today that changes. Publishing puts your game on Roblox so anyone with the link can play it — including the kid sitting next to you.
Here's the part real YouTubers know: the best moments aren't you playing your own game. They're other people playing it — gasping at the spinner, getting squished by the wall, cheering at the fireworks. So today is a playtest party: you publish, you swap games, you play each other's obbies, and you record the reactions. That footage is the raw material for your video.
Before campers publish, demonstrate the whole loop once on the projector:
- Publish your demo obby (File → Publish to Roblox As…).
- Open it from the Roblox app and play a few seconds.
- Start a screen recording with Shift + Command + 5 so kids see exactly where the button is.
- Stop, and show the saved clip in the Roblox YouTuber Clips folder. Keep it to three minutes — they'll do each step themselves next.
Build it
Step 1 — Publish your game
Publishing uploads your game to Roblox so it has its own web link.
- In Roblox Studio, open your finished obby.
- Top menu: File → Publish to Roblox As…
- Give it a Name (your game name from Setup!) and a short Description.
- Pick a genre if it asks, then click Create.
- The first time, Studio confirms it's published. After that, File → Publish to Roblox (no "As") updates the same game.
Publishing needs a signed-in Roblox account. Use the camp's shared/teacher account or a camper's account with a grown-up's OK. New Roblox games may default to private — open the game's page on Roblox Creations and set it so the room can join (Friends or Public for the camp session). Switch it back to private at the end of the day if you like.
Step 2 — Throw the playtest party
Now swap games and play each other's obbies.
- Open the Roblox app (not Studio) and find your game — it's under your experiences, or use the link from Roblox Creations.
- Trade links with a partner (or let your coach drop everyone's links in one place).
- Play a friend's obby start to finish. Notice what's fun, what's brutal, what makes you laugh.
- Tell each other one thing you loved and one thing that was hard. That's real playtesting — and it's how games get better.
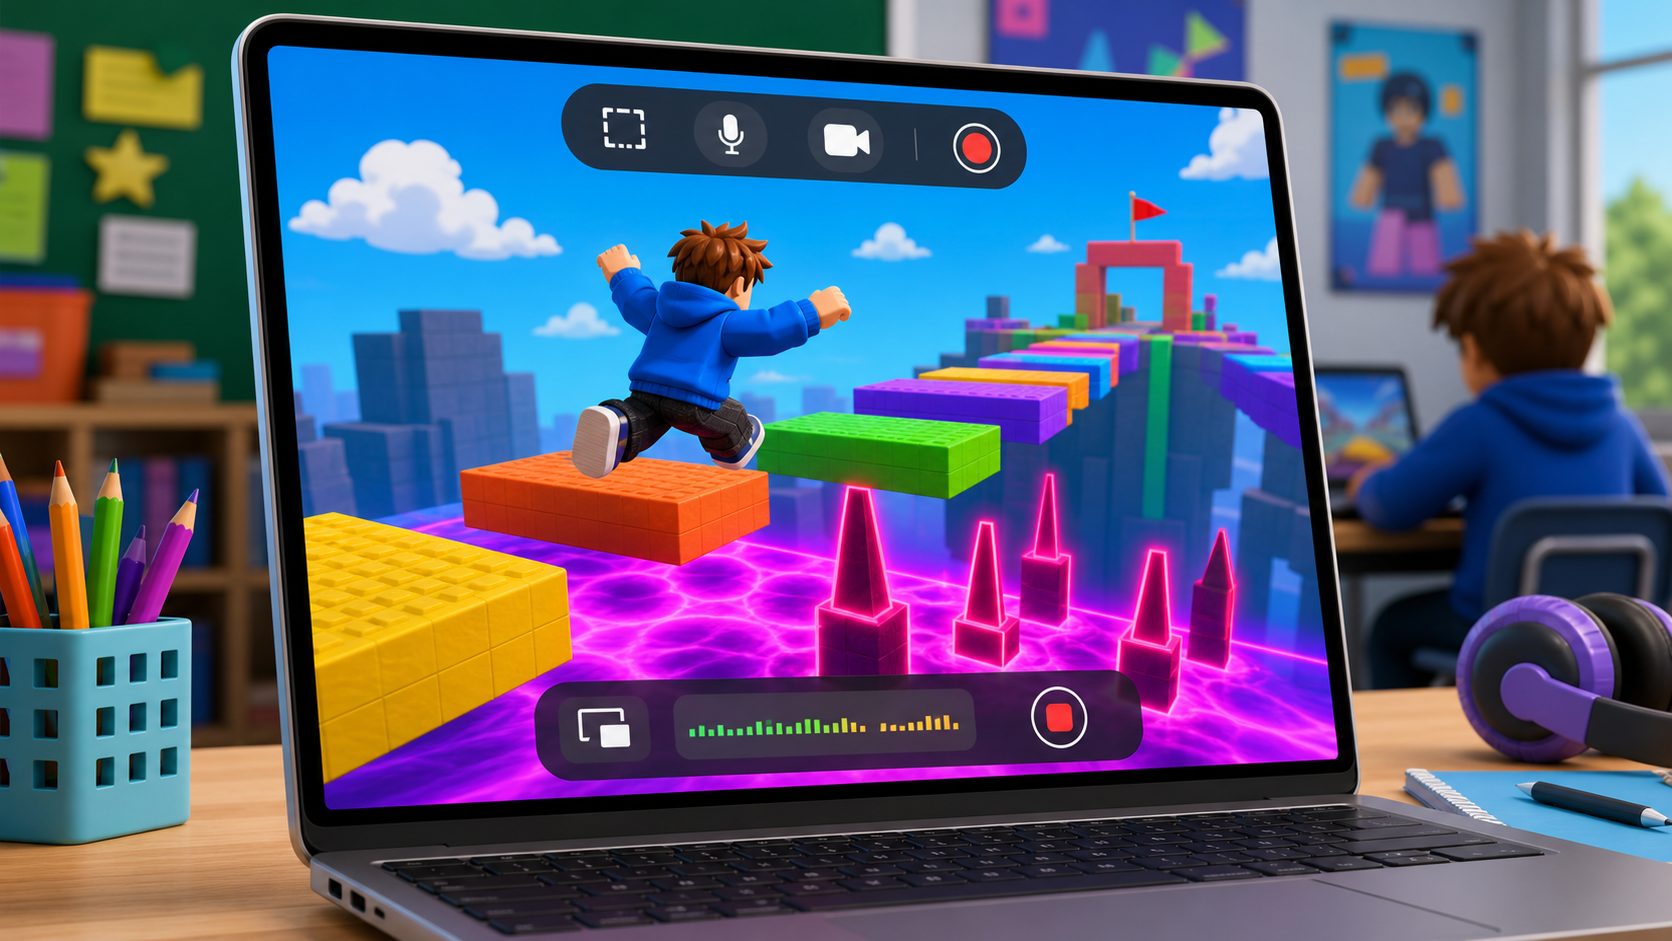
Step 3 — Record the action on your Mac
This is the footage for your video. On a Mac, the easiest recorder is built into the Screenshot toolbar.
- Press Shift + Command + 5.
- Choose Record Selected Portion if you only want the Roblox window, or Record Entire Screen if your coach prefers that.
- Click Options and set Save to → Other Location… → your Roblox YouTuber Clips folder.
- If your coach allows voice, choose the Mac's microphone under Microphone. If not, leave it off.
- Click Record, play the moment, then click the small stop button in the menu bar.
Record short clips of the best moments — a near-miss, a funny fail, a clean run, the fireworks finish. Short clips are easier to edit than one giant recording.
Use your stage list as a checklist:
- Opening climb: show your theme and first checkpoint.
- Sphere/plank moment: capture a jump or tightrope near-miss.
- Danger sound: capture the KillBrick path with audio.
- Fireball or hidden field: capture a surprise or perfect dodge.
- Boulder/spinner: capture the biggest fail or cleanest save.
- Kinetic KillWall: capture the wall chase.
- Puzzle and fireworks: capture the win.
If Shift + Command + 5 is blocked, open QuickTime Player → File → New Screen Recording. It uses the same Mac recording system and can save to the same clips folder.
You're recording the screen and the game, not anyone's face. Still, before you record a friend playing:
- Ask if it's OK. Everyone gets to say no.
- Record the gameplay, not faces. A camera on faces is never required.
- If voices are on, keep it kind — no last names, no personal info. Your coach will tell the room when recording is happening so everyone knows.
Understand it
Publishing is not the same as saving. Saving (.rbxl) keeps a copy on your computer for you. Publishing uploads it to Roblox so others can play it online. A game has to be published before anyone else can join — that's why it's the first step today.
The playtest swap is where games get better. When you watch someone else play, you see things you're blind to in your own game — the jump that's secretly too far, the hazard nobody can see. Real studios playtest constantly. You just did it like a pro.
Recording other people is the heart of a gameplay channel. The famous Roblox YouTubers mostly film reactions — theirs and their friends'. The gasp, the fail, the comeback. That's why we threw a party instead of just hitting record alone: real reactions can't be faked.
Try this
Try this
Three short experiments. Predict before you run, then test your guess.
Before a friend plays your obby, predict which stage will get the biggest reaction. Watch them play. Were you right? Creators learn to guess what an audience will feel.
Record one clip silent and one with commentary if microphone recording is allowed. Watch both back. Which is more fun to watch? What did your voice add?
You now have raw clips. Which moments are keepers, and which are too long or boring? Next stage you'll cut them down — start a mental list of your favorites.
Test your stage
Before moving on:
- Your game is published and a friend was able to join it from the Roblox app.
- You played at least one other camper's obby start to finish.
- You recorded short clips for the best stage moments.
- Your clips are saved somewhere you can find them (the Roblox YouTuber Clips folder).
- You asked before recording anyone, and recorded gameplay, not faces.
- Creator check. Do your clips capture reactions and near-misses, not just quiet walking?
If it breaks
- "Publish" is greyed out or asks me to sign in. You need a signed-in Roblox account — ask a coach to use the camp account or sign in with a grown-up's OK.
- My friend can't join my game. It's probably still private. Open the game on Roblox Creations and set it so the room can join, then have them rejoin.
- Shift + Command + 5 does nothing. Ask a coach to check the keyboard shortcut or use QuickTime Player → File → New Screen Recording.
- My recording has no sound. In the Screenshot toolbar, open Options before recording and pick the microphone if voice is allowed. Game audio may depend on the Mac's audio settings; a silent gameplay clip is still usable if the video looks good.
- My clip saved to the Desktop. Drag it into your Roblox YouTuber Clips folder before Stage 9.
- My clip is huge and laggy. You recorded one long take. Next time, record short clips of just the good moments — they're smaller and far easier to edit.
This is the loudest, most exciting stage — lean into it. A few tips for a room of 7–10 year-olds:
- Publish together, then party. Get everyone published first (circulate and help with accounts/visibility), then open the floor to swapping. Mixing the two causes chaos.
- Name the recording rule out loud before anyone hits record: ask first, gameplay not faces, be kind. Repeat it.
- Kids will want to record everything. Coach them toward short clips of best moments — it makes Stage 9's editing far easier.
- Keep the published games Private/Friends/Public only as needed for the session; you'll be posting the video, not the game, so the game does not need to stay broadly public.