Stage 2: Sphere Staircase & Plank Walkway
Make sure you've finished Stage 1: Ascending Walls — Stage 2 reuses the checkpoint pattern we set up there.
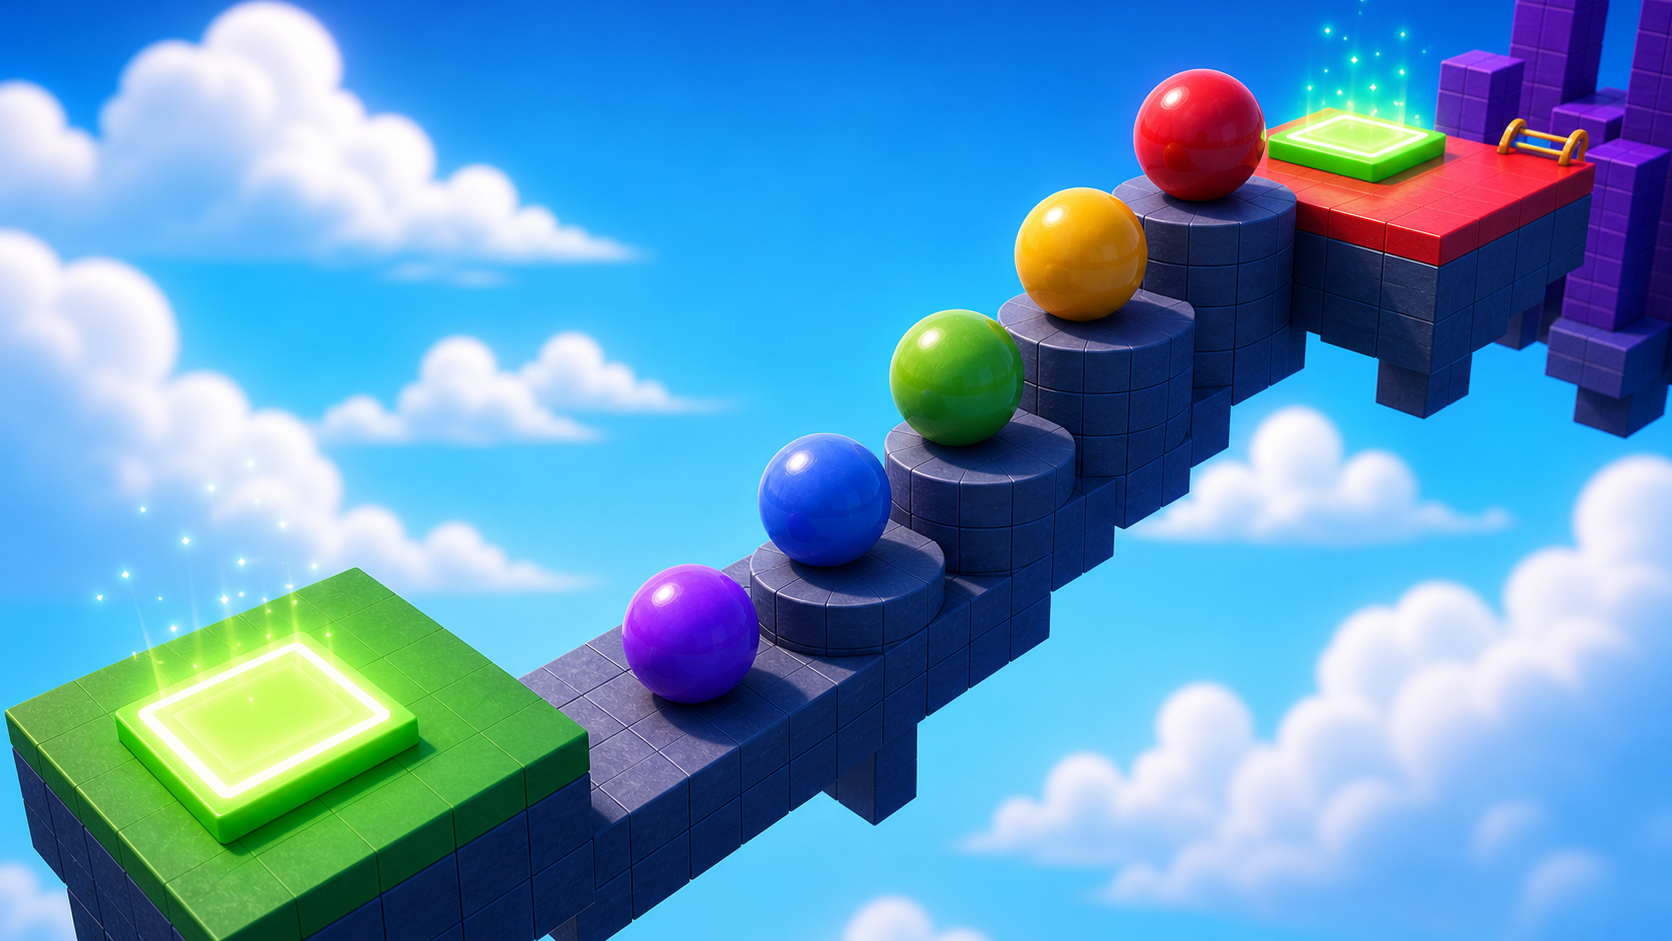
a sphere staircase and a narrow plank bridge
how shape and width change how a jump feels
two new obstacles, each with its own checkpoint

Preview the round-platform climb and the narrow plank bridge that follows it.
Build this stage belowThe big idea
Stage 1 used blocks. Blocks have flat tops — easy to land on. Today we add two new obstacles that change how jumping feels, without adding any code.
First, spheres: round on top, so players have to land near the middle or they'll slide off. Then a plank walkway: long, thin parts in the sky where one slip means falling. The lesson is shape and width change difficulty. Same Roblox tools, totally different feeling.
These two obstacles also make great video moments — a near-miss on a sphere or a careful tightrope walk is exactly the kind of "ooooh" clip viewers love. Build them to look good.
Stage 2 clip target: In Stage 8, capture one short clip where a player almost slips off a sphere or plank, then saves it. The best clip shows the risk and the recovery in the same shot.
Build it
Step 1 — Build the sphere staircase
Three spheres stacked as steps. Same idea as Stage 1's wall, but the round tops force careful jumping.
1.1 Make three spheres
In the Workspace, click + → Part → Sphere three times. You should now have three round balls.
1.2 Color them in
Click each sphere and use Properties to pick a BrickColor and Material that match your theme. Bright, fun colors look great here.
1.3 Set the size
All three spheres should be the same size. Click each one and set Size to [4, 4, 4].
1.4 Stack them as steps
Drag the spheres so each one sits a bit higher and a bit further than the last — like steps. Press ▶ Play and try to jump from sphere to sphere up to the top. Players have to land near the middle or they'll roll off.
Step 2 — Add the sphere checkpoint
The checkpoint at the top of the spheres is the third checkpoint in your obby. Same pattern as Stage 1 — fresh color so players know they reached a new stage.
2.1 Add another SpawnLocation
In Explorer, right-click Workspace → Insert Object → SpawnLocation.
2.2 Set its properties
- BrickColor → a new color, different from your earlier checkpoints.
- AllowTeamChangeOnTouch → checked.
- Neutral → unchecked.
- TeamColor → matches the BrickColor.
2.3 Tag it with its stage number
In the Attributes section of Properties, add a StageNumber attribute (number type) and set its value to 3.
2.4 Add a Team
- In Teams, insert a new Team named Stage 3.
- Uncheck AutoAssignable — only Stage 1 is the team players start on.
- Set TeamColor to match.
Drag the new SpawnLocation onto the top sphere.
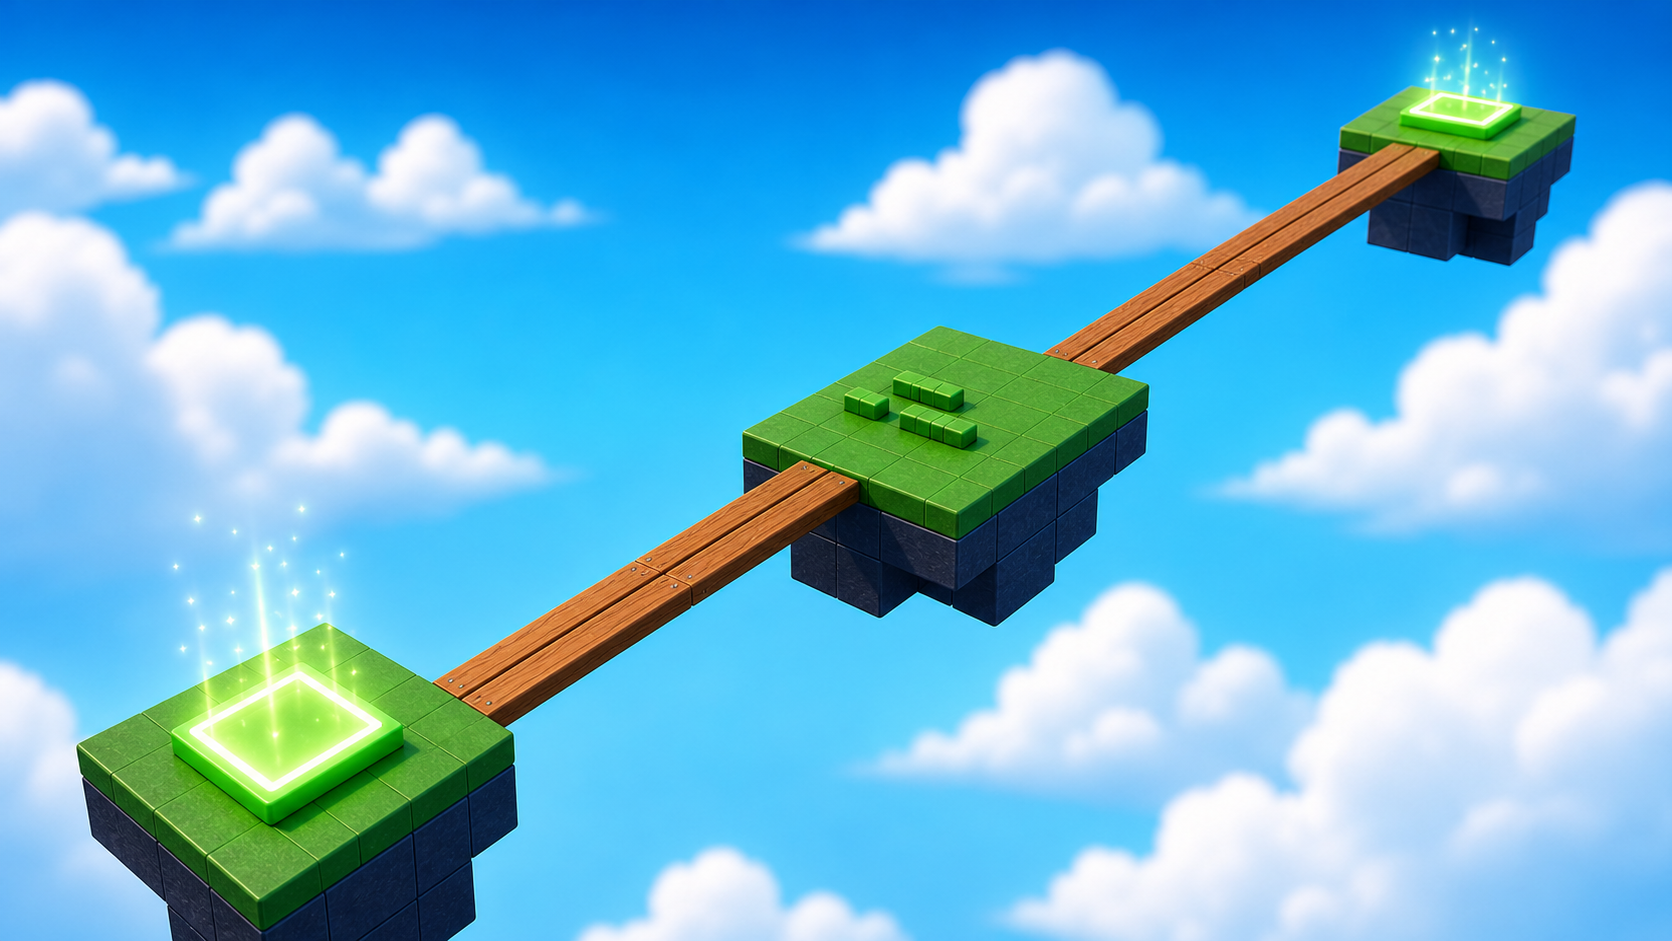
Step 3 — Build the plank walkway
Now switch from jumping up to walking across. Three long thin planks connected by a wider rest-stop platform in the middle.
3.1 Make three planks
In the Workspace, click + → Part three times. Set each one's BrickColor and Material — wood looks great here.
3.2 Make them long and narrow
Planks are long, thin, and narrow. In Properties, set each plank's Size to [2, 1, 21] — short width, thin height, long length.
3.3 Add a rest stop
Make one more part and set its Size to [13, 1, 6]. That's a wide, thin platform — wide enough for a player to stand on without aiming.
3.4 Line them up
Drag the three planks end-to-end, with the rest stop in the middle. Press ▶ Play and walk across. Long thin planks feel risky to walk on — that's the point.
Step 4 — Add the plank checkpoint
Same drill — a SpawnLocation at the far end of the walkway and a matching Team. This is the fourth checkpoint. By now the pattern should feel automatic.
4.1 Add another SpawnLocation
In Explorer, right-click Workspace → Insert Object → SpawnLocation.
4.2 Set its properties
- BrickColor → a new color.
- AllowTeamChangeOnTouch → checked.
- Neutral → unchecked.
- TeamColor → matches the BrickColor.
4.3 Tag it with its stage number
In the Attributes section, add a StageNumber attribute (number type) and set its value to 4.
4.4 Add a Team
- In Teams, insert a new Team named Stage 4.
- Uncheck AutoAssignable.
- Set TeamColor to match.
Drag the SpawnLocation onto the end of your walkway.
Understand it
A sphere is just a part with a round shape — Roblox treats it the same as a block. It feels harder because gravity pulls the player toward the center of any surface. A flat block keeps them on top; a round sphere lets them slide off. We kept the size at [4, 4, 4] on purpose, so the difficulty comes from one change — the shape — not from a confusing mix.
A plank is the same part stretched along one axis. Size = [2, 1, 21] means 21 studs long, 2 wide, 1 thin. Narrowing the path increases tension — we didn't add any hazard, we just shrank the walkable surface. The player's imagination does the rest.
The rest stop is borrowed from real level design: a wide, safe spot between two scary sections. It gives the player a moment to breathe, which makes the next plank feel new instead of exhausting. Good pacing keeps a viewer watching, too.
Try this
Try this
Three short experiments. Predict before you run, then test your guess.
Change all your spheres to size [3, 3, 3], then [2, 2, 2]. Predict which is hardest to land on before you try. Were you right?
Try planks of different lengths — [2, 1, 15] then [2, 1, 30]. Walk both. Which feels more dangerous, and why?
Spheres make players aim; planks make players balance. Which one do you think will produce a better "I almost fell!" moment when you record a friend playing later?
Test your stage
Before moving on:
- Press ▶ Play and start from the Stage 2 (sphere) checkpoint.
- Jump across the spheres, then walk the planks without falling off the sides.
- Stop on the rest platform, then finish the bridge.
- Touch each new checkpoint, reset, and confirm you respawn at the right one.
- Design check. Do the spheres and planks feel harder than Stage 1, but still possible after a few tries?
If it breaks
- My character keeps sliding off the spheres. That's the design — spheres are supposed to be tricky. If they're impossible (not just hard), move them closer together.
- I made a Sphere but it looks like a block. You clicked + → Part and forgot to switch to Sphere. Click the part, find Shape in Properties, change it to Ball.
- My character keeps falling off the planks. If it's impossible (not just scary), widen them to
[3, 1, 21]. - A checkpoint sends me back to the wrong stage. Color mismatch — open the SpawnLocation and its Team, and make BrickColor + TeamColor + the Team's TeamColor all match.
- The spheres or planks float off on their own. Anchored is unchecked. Click each part, find Anchored in Properties, and check it.