Stage 10: Code Lock and Launch
Your game remembers, saved at Checkpoint_10. This is it — the finale. One last puzzle that takes everything you've learned, one full run of the world you built, and then launch day for your game.
Narration transcript
- Stage Nine taught your game to remember a key, saved at Checkpoint zero ten. Keep that tested checkpoint open. Stage Ten begins there.
- Build the finale puzzle, test your whole game start to finish, and launch it privately — for real.
- Spoken bridge: Mission ready. First, understand the idea that makes this stage work.
a sequence code lock and a celebration room
how a table and index remember ordered progress
your game — tested, launched, and real
Idea
Narration transcript
- A table stores a sequence, and an index walks through it one press at a time. Right press: the index moves forward. Wrong press: it resets. Your clue makes the puzzle solving instead of guessing — and then it is launch day for the game you named in Setup.
- Spoken bridge: Turn that idea into three small Logic Cards.
A code lock must remember more than true or false. A table stores the correct order. An index remembers which answer comes next. A correct press advances the index; a wrong press resets it. Your clue is what makes it a puzzle — a puzzle with information is solving; without information it's guessing.
"Launch" does not mean going public. New Roblox experiences begin private — an online copy that only you can open. You'll publish yours, keep it private, and show it off from your own screen. And like Stage 9, this finale is part of your solo adventure: one code, one player, one victory.
Logic Board
Finish these cards from left to right. Each card becomes a Code Quest below.
- 1Card A
Narration transcript
- Build the puzzle room: buttons, clues, status light, locked exit.
- The room holds players until they solve it.
Build the code lock
Build the puzzle room: buttons, clues, status light, locked exit.
Done when: The room holds players until they solve it. - 2Card B
Narration transcript
- Script the code lock with a table and an index.
- Wrong and right sequences both respond visibly.
Track the sequence
Script the code lock with a table and an index.
Done when: Wrong and right sequences both respond visibly. - 3Card C
Narration transcript
- Run the whole game, then launch it privately.
- A full run works and your game is live for you.
- Spoken bridge: The plan is complete. Pick your Build Mode on the page and build one card at a time — pause after every Studio action.
Prove and launch
Run the whole game, then launch it privately.
Done when: A full run works and your game is live for you.
Build
Pick your Build Mode for the room — the code lock script is the same for everyone. Four exact names this time: the three buttons and the status light.
Every builder plays this stage in their own mode. Which sounds like you?
Not sure? Start with Guided — you can level up on any stage, and your pick follows you through the whole course.
Names that must match
Build inside Workspace → Course → Stage10, from Checkpoint_10 to Checkpoint_11. Scripts find objects by name — these spellings are the wiring. Everything else about each object is your call.
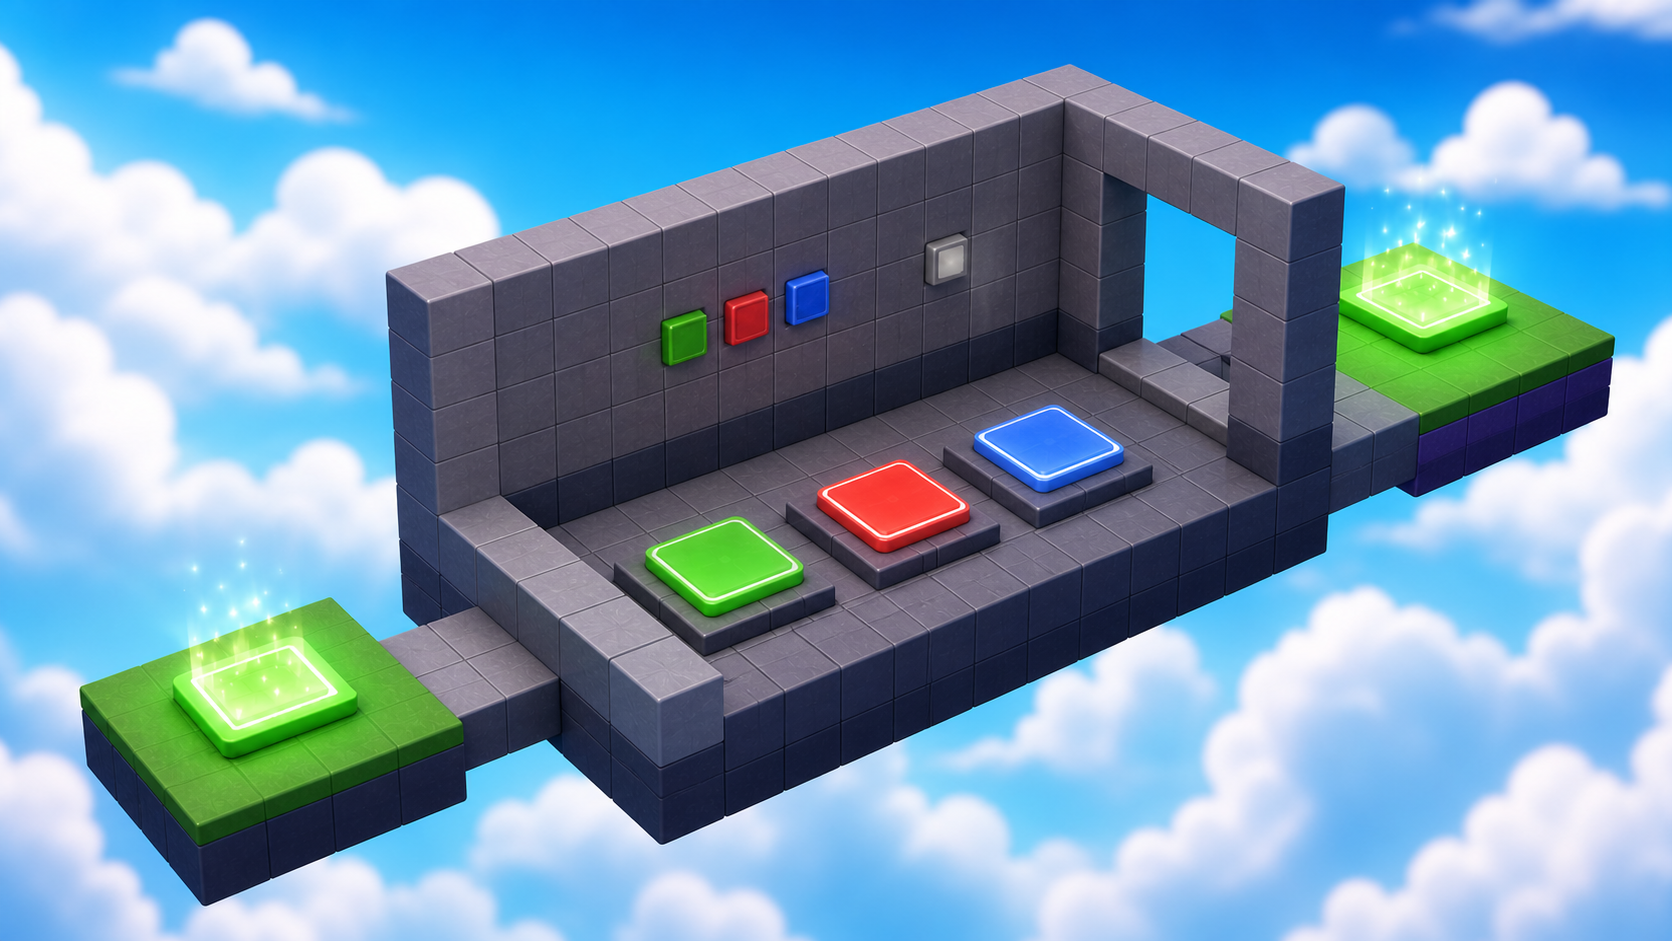
PuzzleFloorThe room where the puzzle happens.Wall_LeftEncloses the puzzle room.Wall_RightEncloses the puzzle room.ExitDoorLocked until the code is entered.Must have: Script: CodeLockControllerButton_GreenOne code button. The exact name matters — the script calls WaitForChild("Button_Green").Must have: ClickDetector · MaxActivationDistance 12Button_RedOne code button. The exact name matters — the script calls WaitForChild("Button_Red").Must have: ClickDetector · MaxActivationDistance 12Button_BlueOne code button. The exact name matters — the script calls WaitForChild("Button_Blue").Must have: ClickDetector · MaxActivationDistance 12Clue_GreenPart of the clue that shows the code order.Must have: CanCollide falseClue_RedPart of the clue that shows the code order.Must have: CanCollide falseClue_BluePart of the clue that shows the code order.Must have: CanCollide falseStatusLightShows progress after each press. The exact name matters — the script calls WaitForChild("StatusLight").Must have: Material Neon · CanCollide falseCelebrationFloorWhere a finished run celebrates — the final checkpoint stands here.
Reference buildStuck, or just want to copy ours? Here is exactly how we built this stage.
These values always work together. Copy them as-is, or borrow a few and keep the rest of the stage yours.
Build this partPuzzleFloor
Part · BlockOpen recipe
PuzzleFloor
Part · Block- Size
- 24 × 1 × 24
- Anchored
- ✓ Yes
- Orientation
- 0 × 0 × 0
- CanCollide
- ✓ Yes
- Place
- Position [0, 3.5, 577] inside Workspace → Course → Stage10
Build this partWall_Left
Part · BlockOpen recipe
Wall_Left
Part · Block- Size
- 1 × 10 × 24
- Anchored
- ✓ Yes
- Orientation
- 0 × 0 × 0
- CanCollide
- ✓ Yes
- Place
- Position [-12, 8.5, 578] inside Workspace → Course → Stage10
Build this partWall_Right
Part · BlockOpen recipe
Wall_Right
Part · Block- Size
- 1 × 10 × 24
- Anchored
- ✓ Yes
- Orientation
- 0 × 0 × 0
- CanCollide
- ✓ Yes
- Place
- Position [12, 8.5, 578] inside Workspace → Course → Stage10
Build this partExitDoor
Part · BlockOpen recipe
ExitDoor
Part · Block- Size
- 24 × 10 × 1
- Anchored
- ✓ Yes
- Orientation
- 0 × 0 × 0
- CanCollide
- ✓ Yes
- Place
- Position [0, 8.5, 589.5] inside Workspace → Course → Stage10
Children: Script: CodeLockController.
Build this partButton_Green
Part · BlockOpen recipe
Button_Green
Part · Block- Size
- 4 × 1 × 4
- Color
- Bright green
- Anchored
- ✓ Yes
- Orientation
- 0 × 0 × 0
- CanCollide
- ✓ Yes
- Place
- Position [6, 4.5, 574] inside Workspace → Course → Stage10
Children: ClickDetector · MaxActivationDistance 12.
Build this partButton_Red
Part · BlockOpen recipe
Button_Red
Part · Block- Size
- 4 × 1 × 4
- Color
- Really red
- Anchored
- ✓ Yes
- Orientation
- 0 × 0 × 0
- CanCollide
- ✓ Yes
- Place
- Position [0, 4.5, 574] inside Workspace → Course → Stage10
Children: ClickDetector · MaxActivationDistance 12.
Build this partButton_Blue
Part · BlockOpen recipe
Button_Blue
Part · Block- Size
- 4 × 1 × 4
- Color
- Bright blue
- Anchored
- ✓ Yes
- Orientation
- 0 × 0 × 0
- CanCollide
- ✓ Yes
- Place
- Position [-6, 4.5, 574] inside Workspace → Course → Stage10
Children: ClickDetector · MaxActivationDistance 12.
Build this partClue_Green
Part · BlockOpen recipe
Clue_Green
Part · Block- Size
- 2 × 2 × 1
- Color
- Bright green
- Anchored
- ✓ Yes
- Orientation
- 0 × 0 × 0
- CanCollide
- ✗ No
- Place
- Position [3, 8, 588.4] inside Workspace → Course → Stage10
Build this partClue_Red
Part · BlockOpen recipe
Clue_Red
Part · Block- Size
- 2 × 2 × 1
- Color
- Really red
- Anchored
- ✓ Yes
- Orientation
- 0 × 0 × 0
- CanCollide
- ✗ No
- Place
- Position [0, 8, 588.4] inside Workspace → Course → Stage10
Build this partClue_Blue
Part · BlockOpen recipe
Clue_Blue
Part · Block- Size
- 2 × 2 × 1
- Color
- Bright blue
- Anchored
- ✓ Yes
- Orientation
- 0 × 0 × 0
- CanCollide
- ✗ No
- Place
- Position [-3, 8, 588.4] inside Workspace → Course → Stage10
Build this partStatusLight
Part · BlockOpen recipe
StatusLight
Part · Block- Size
- 2 × 2 × 1
- Color
- Medium stone grey
- Material
- Neon
- Anchored
- ✓ Yes
- Orientation
- 0 × 0 × 0
- CanCollide
- ✗ No
- Place
- Position [8, 8, 588.4] inside Workspace → Course → Stage10
Build this partCelebrationFloor
Part · BlockOpen recipe
CelebrationFloor
Part · Block- Size
- 18 × 1 × 18
- Anchored
- ✓ Yes
- Orientation
- 0 × 0 × 0
- CanCollide
- ✓ Yes
- Place
- Position [0, 3.5, 599] inside Workspace → Course → Stage10
Button_Green · Button_Red · Button_Blue
Code
Build a fair puzzle room
Narration transcript
- Build your finale inside Stage zero ten: a puzzle floor, walls that keep players in, a locked ExitDoor, three buttons named exactly Button underscore Green, Red, and Blue with ClickDetectors, a clue that shows the order, and a StatusLight visible from the buttons — arranged your way per your track.
- Spoken bridge: Card A now matches its success check. Continue to Card B.
A — The room. Build your finale per your track: floor, walls, sealed exit, three named buttons with ClickDetectors, a clue that shows the order, and a status light visible from the buttons. Then stand at the buttons in Play mode and read your clue from the player's left to right — that exact order goes in the script. A puzzle with information is solving; without it, guessing.
Remember and check the sequence
Narration transcript
- The script stores the correct order in a table and walks it with an index — matching your clue exactly.
- Insert CodeLockController inside ExitDoor, type and compare the script, press wrong and right sequences while watching the StatusLight, then build your celebration space behind the door and complete the final checkpoint recipe.
- Spoken bridge: The behavior passed its focused test. Finish the checkpoint handoff.
The table stores the correct order; the index walks it one press at a time — matching your clue exactly.
B — The lock. Insert a Script inside ExitDoor, rename it CodeLockController, and build it in three layers: objects and memory, the decision function, the inputs. Test wrong-first, then the right order. Then build your celebration space behind the door and complete the final checkpoint recipe.
First, the objects and memory:
local door = script.Parent
local stageFolder = door.Parent
local green = stageFolder:WaitForChild("Button_Green")
local red = stageFolder:WaitForChild("Button_Red")
local blue = stageFolder:WaitForChild("Button_Blue")
local statusLight = stageFolder:WaitForChild("StatusLight")

local correctOrder = {"Green", "Red", "Blue"}
local currentIndex = 1
Now the decision function:
local function handlePress(color)
  if currentIndex > #correctOrder then return end
  local expected = correctOrder[currentIndex]

  if color == expected then
    currentIndex = currentIndex + 1
    statusLight.Color = Color3.fromRGB(255, 220, 80)
    if currentIndex > #correctOrder then
      door.CanCollide = false
      door.Transparency = 0.8
      statusLight.Color = Color3.fromRGB(80, 255, 120)
    end
  else
    currentIndex = 1
    statusLight.Color = Color3.fromRGB(255, 70, 70)
  end
end
Finally, connect each input:
green.ClickDetector.MouseClick:Connect(function() handlePress("Green") end)
red.ClickDetector.MouseClick:Connect(function() handlePress("Red") end)
blue.ClickDetector.MouseClick:Connect(function() handlePress("Blue") end)
Test a wrong press first: the light turns red and the door stays shut. Then the right order: yellow while correct, green when solved, door open.
Compare your finished script
local door = script.Parent
local stageFolder = door.Parent
local green = stageFolder:WaitForChild("Button_Green")
local red = stageFolder:WaitForChild("Button_Red")
local blue = stageFolder:WaitForChild("Button_Blue")
local statusLight = stageFolder:WaitForChild("StatusLight")

local correctOrder = {"Green", "Red", "Blue"}
local currentIndex = 1

local function handlePress(color)
  if currentIndex > #correctOrder then return end
  local expected = correctOrder[currentIndex]

  if color == expected then
    currentIndex = currentIndex + 1
    statusLight.Color = Color3.fromRGB(255, 220, 80)

    if currentIndex > #correctOrder then
      door.CanCollide = false
      door.Transparency = 0.8
      statusLight.Color = Color3.fromRGB(80, 255, 120)
    end
  else
    currentIndex = 1
    statusLight.Color = Color3.fromRGB(255, 70, 70)
  end
end

green.ClickDetector.MouseClick:Connect(function()
  handlePress("Green")
end)

red.ClickDetector.MouseClick:Connect(function()
  handlePress("Red")
end)

blue.ClickDetector.MouseClick:Connect(function()
  handlePress("Blue")
end)
Checkpoint recipeSave progress at Finished
Using the voice guide? It reads one recipe step, waits while you work, then continues when you choose Done — hear next step.
- Insert one SpawnLocation in Workspace and rename it
Checkpoint_11. Set Size to about[6, 1, 6]and Anchored totrue. On the celebration floor in Stage 10, where a finished run ends. (Our reference build puts it at Position[0, 4.5, 599].) - Set Neutral to
false, Enabled totrue, and AllowTeamChangeOnTouch totrue. - Set the SpawnLocation TeamColor to
Institutional white. Set its visual BrickColor to the same named color. TeamColor controls respawning; BrickColor only controls what the pad looks like. - Point at Teams in Explorer, select its +, and insert one Team named
Finished. Set its TeamColor toInstitutional whiteand AutoAssignable tofalse. Never reuse this TeamColor on another checkpoint. - Press Play. Climb to and touch
Checkpoint_11, then reset your character and confirm you respawn there. Press Stop before editing again.
Workspace → Checkpoint_11Teams → Finished (Institutional white)Test everything, then launch
Narration transcript
- Save your game, then play it start to finish from the Lobby without editor shortcuts. When it holds up, launch: choose File, then Publish to Roblox, name it with your game's title — never your real name, school, or town — and select Create. New experiences start private; leave them private. If the account will not publish, a grown-up finishes that one step.
- Spoken bridge: The next checkpoint saved. One designer check before you style it: does your stage pass?
C — Launch day. Save your game file, then play it start to finish from the Lobby — every checkpoint, hazard, key, and puzzle, no editor shortcuts. When it holds up, launch:
- Choose File → Publish to Roblox. Enter your game's name and a short description, keep the default device choices, and select Create. Your game now lives on Roblox — privately.
- The title and description never include your real name, school, town, or contact info. Your game's name is enough.
- New experiences start private, and private is where yours stays — only you can open it. Don't switch it to Limited or Public.
- Want to double-check? Open your experience's settings in the Creator Dashboard and confirm it isn't Public. If the account won't let you publish at all, keep your saved file — it's your game either way — and ask a grown-up to do that one step.
For grown-ups: Roblox's official guides cover publishing and experience settings.
Does It Pass?
Narration transcript
- Time for the launch check. Play your finale and walk the pass list: the clue makes the code solvable, the light answers every press, the room holds until solved, and one full run of your whole game finishes with a clean Output. A rule that fails is just the next thing to tune.
- Spoken bridge: Your stage passes — it is a real level now. Time to make it feel like your game.
Does your stage pass?
Play your stage and check each one. A rule that fails isn't a mistake — it's just the next thing to tune.
- Nothing moves, falls, or drifts — every part stays exactly where you put it.Check: Press Play — everything stays put.Tip: Anchored on for every part, and CanCollide on for anything players stand on.
- The clue's order matches the secret code in the script, so the puzzle is solving, not guessing.Check: Read the clue, press in that order, and the door opens first try.
- The status light is visible from the buttons and changes after every press.Check: Press a button and watch the light without moving.
- The walls and locked door keep players in the room until they solve it — no jumping out.Check: Try to leave without solving: you can't.
- A full run from the Lobby to the celebration floor finishes with no red errors in Output.Check: Run your whole game start to finish and watch Output stay clean.
Make It Yours
Narration transcript
- Dress your finale: clue and celebration room in your world's style, with your game's name on display where finishers will see it. This is the room players remember.
- Spoken bridge: That is your stamp on the stage. Now explain what made it work.
Dress your finale in the style of your world — and put your game's name on display in the celebration room where every finisher will see it. Build the letters from parts, paint them on a wall of tiles, make them glow. This is the room players remember; make it unmistakably yours.
Help Ladder
Stuck? Choose what went wrong
Pick the problem that matches. Open one clue, try it, then return only if you still need help.
My parts overlap or miss the next checkpoint
Clue 1: small hint
Narration transcript
- Stop Play mode and check one part against the stage rules before touching anything else.
Clue 2: where to look
Narration transcript
- Check Workspace, Course, Stage zero 10, and keep both checkpoints directly inside Workspace.
Workspace → Course → Stage10. Find Checkpoint_10 and Checkpoint_11 directly inside Workspace.Clue 3: worked answer
Narration transcript
- Walk your stage rules top to bottom and fix the first rule that fails. If you want a layout that always works, open the reference build and copy its values.
Checkpoint_10.the right code doesn't open the gate
Clue 1: small hint
Clue 2: where to look
correctOrder in the script.Clue 3: worked answer
button clicks do nothing
Clue 1: small hint
Narration transcript
- The Script must find both the button and the ClickDetector inside it.
Clue 2: where to look
Narration transcript
- Expand each Button in Explorer and confirm its exact name and an indented ClickDetector.
Clue 3: worked answer
Narration transcript
- Use exact names Button underscore Green, Red, and Blue. Put one ClickDetector inside each and the Script inside ExitDoor.
Button_Green, Button_Red, and Button_Blue. Put one ClickDetector inside each and the Script inside ExitDoor.Learn What Happened
Narration transcript
- A table held the sequence, an index remembered progress, and a reset punished wrong guesses gently. Publishing privately made an online copy that only you can open. And across ten stages you have used events, state, loops, functions, conditions, and tables — a real programmer's toolkit, all inside your own game.
- Spoken bridge: Use one small prediction to transfer that idea.
The table held three values in order; currentIndex walked them; #correctOrder counted them. Passing the last one opened the door; any wrong input reset memory, and the StatusLight made that invisible reset visible. Across ten stages you've now used properties, events, state, conditions, loops, functions, and tables — a real programmer's toolkit, all inside a game that's yours.
Publishing privately made an online copy that only you can open. Show your game off right from Studio, or play the published copy signed into your own account — either way, someone can hold the controller while you watch them play your world.
Try This
Narration transcript
- Predict what happens if the clue order and the table disagree, compare by reading both, and connect the fix to the idea of one source of truth.
- Spoken bridge: Finish with four proof checks. Each check must match something you can observe or explain.
Try this
Three short thinking checks. Use evidence from the stage you just built.
Prove It
Narration transcript
- Spoken bridge: Final proof. Confirm one result at a time.
- Wrong and correct button sequences produce visible results.
- A full run finishes with no red Output errors.
- The local or private launch contains no personal data.
- You can explain table/index behavior and verify the finish.
Narration transcript
- Launch day. You built, tested, and launched your own game — one thousand XP, Obby Launcher rank. Your world is real now: hand someone the controller and watch them play what you designed.