Stage 10: Puzzle Room + boss and publish
Finish Stage 9. Your obby has nine working stages, a wave arena, and every combat system feeding the next. Today you build the boss and publish the whole thing.
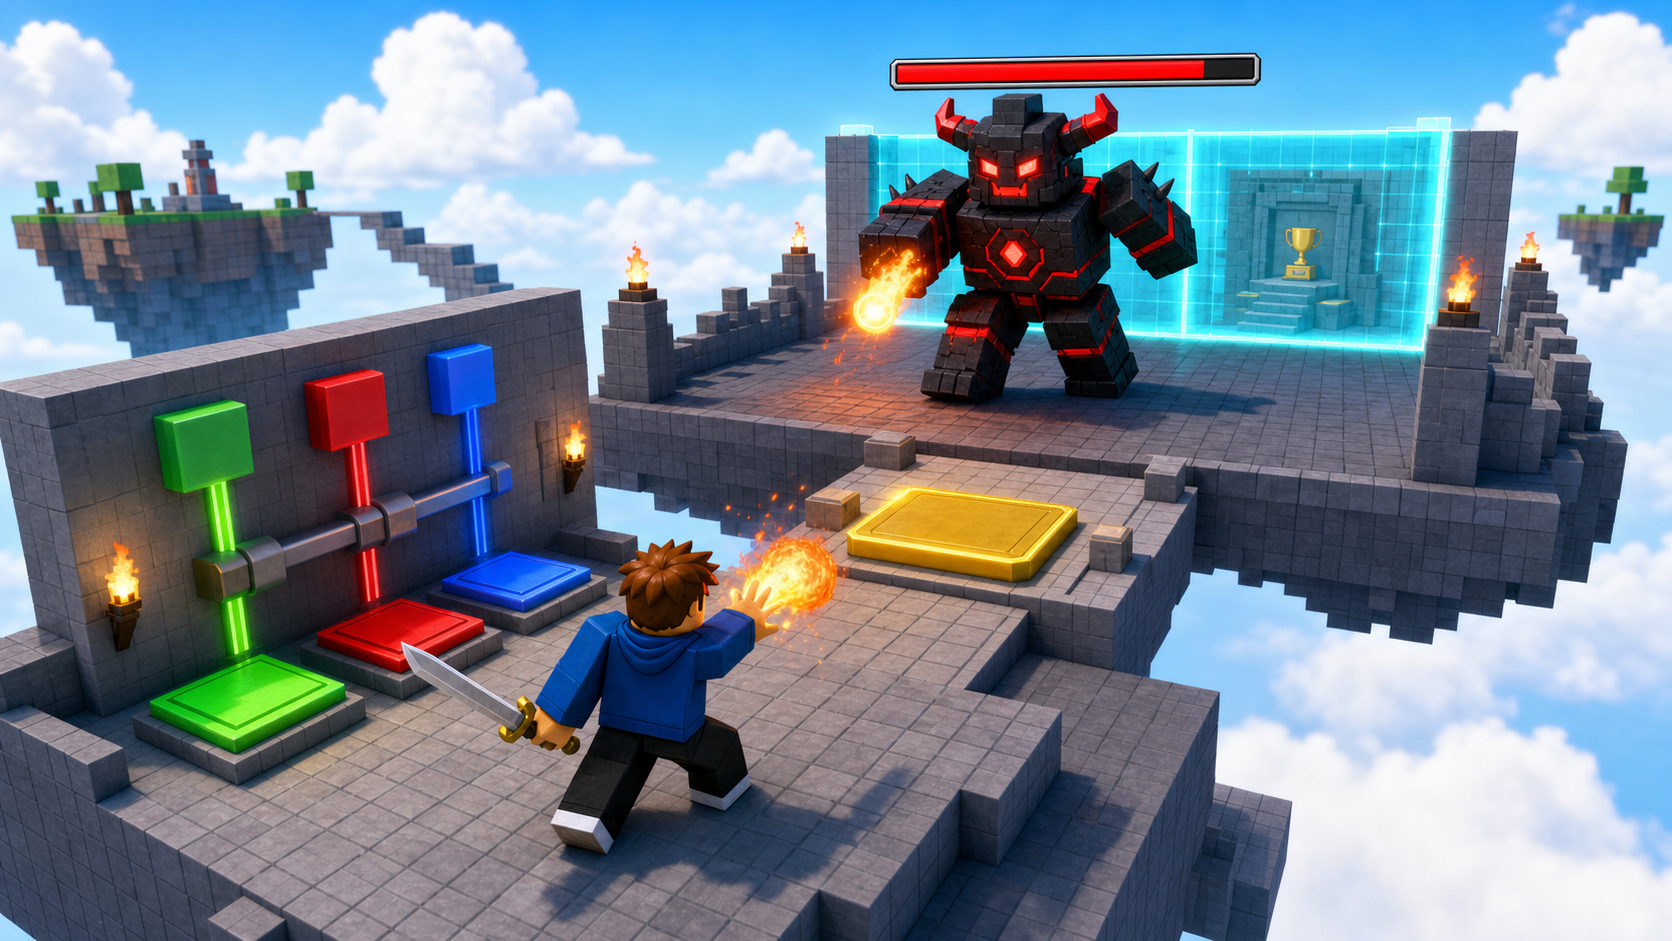
the puzzle room, the Finish pad, the ExtensionPad boss arena, a victory wall, and a published game
how to assemble a boss from everything you've built, open the final area when it falls, and publish to Roblox
a live, shareable combat obby where defeating your boss destroys the victory wall and opens the final room
90-second demo:
- Show the finished game: climb, fight the turret, blast enemies, clear the arena, solve the puzzle.
- Step onto the ExtensionPad — the boss wakes and attacks. It has a huge health bar. Fight it down with sword and fireball.
- When the boss falls, the glowing victory wall is destroyed and the final celebration room opens.
- Show the published game URL on the billboard. Open it in the Roblox player, not Studio.
- Explain: "The boss isn't new code — it's everything you already built, turned up. That's how real games scale."
The big idea
Today's capstone turns your Studio file into a real Roblox game with a URL — and it ends with a boss.
Here's the satisfying part: the boss is nothing new. It's the enemy AI from Stage 7 with far more health and harder hits, given a health bar by your Stage 6 code, defeatable by the sword and fireball you built in Stages 3 and 4, and gating a wall the way Stage 9's wave gated the gate. A boss fight is just your whole toolkit pointed at one big enemy. When it falls, the victory wall is destroyed and the final area opens — exactly the "defeat the boss to win" promise this course is named for.
Then you publish. Until you publish, your combat game is a file on one laptop. After you publish, it's a Roblox game anyone can join from a link.
- boss
- a single powerful enemy that gates the ending; built from the same AI as a normal enemy, scaled up
- victory wall
- a barrier that's destroyed when the boss is defeated, opening the final area
- Publish
- uploading your Studio file to Roblox so it gets a public URL
- live game
- a published game players can join outside Studio
- ExtensionPad
- the celebration area behind the Finish pad — here, the boss arena
- republish
- publishing again after edits so the live game gets the latest version
Build it
Step 1 — Build the puzzle room
A small room with three colored buttons. Pressing them in the right order destroys the back wall. Same recipe as the base obby.
Build this partPuzzleFloor
BlockOpen recipe
PuzzleFloor
Block- Size
- 12 × 1 × 12
- Color
- Dark stone grey
- Material
- Concrete
- Anchored
- ✓ Yes
- Place
- In front of the Stage 10 magenta pad, stretching forward 12 studs
Build this partPuzzleWall_Left
BlockOpen recipe
PuzzleWall_Left
Block- Size
- 1 × 8 × 12
- Color
- Brick yellow
- Material
- Brick
- Anchored
- ✓ Yes
- Place
- Along the left edge of PuzzleFloor
Build this partPuzzleWall_Right
BlockOpen recipe
PuzzleWall_Right
Block- Size
- 1 × 8 × 12
- Color
- Brick yellow
- Material
- Brick
- Anchored
- ✓ Yes
- Place
- Along the right edge
Build this partPuzzleWall_Back
BlockOpen recipe
PuzzleWall_Back
Block- Size
- 12 × 8 × 1
- Color
- Really red
- Material
- Neon
- Anchored
- ✓ Yes
- Place
- At the FAR end of the room
The script finds this wall by name. Leave it named exactly PuzzleWall_Back.
Build this partButton_Green
CylinderOpen recipe
Button_Green
Cylinder- Size
- 1 × 2 × 2
- Color
- Lime green
- Material
- Neon
- Anchored
- ✓ Yes
- Place
- On PuzzleFloor, leftmost button
Build this partButton_Red
CylinderOpen recipe
Button_Red
Cylinder- Size
- 1 × 2 × 2
- Color
- Really red
- Material
- Neon
- Anchored
- ✓ Yes
- Place
- On PuzzleFloor, middle button
Build this partButton_Blue
CylinderOpen recipe
Button_Blue
Cylinder- Size
- 1 × 2 × 2
- Color
- Bright blue
- Material
- Neon
- Anchored
- ✓ Yes
- Place
- On PuzzleFloor, rightmost button
Right-click each Button_* part → Insert Object → ClickDetector.
Right-click PuzzleWall_Back → Insert Object → Script. Type:
local wall = script.Parent

local greenButton = workspace:WaitForChild("Button_Green")
local redButton = workspace:WaitForChild("Button_Red")
local blueButton = workspace:WaitForChild("Button_Blue")

local correctOrder = {"Green", "Red", "Blue"}
local currentIndex = 1

local function handleButton(buttonName)
  if buttonName == correctOrder[currentIndex] then
    currentIndex = currentIndex + 1
    if currentIndex > #correctOrder then
      wall:Destroy()
    end
  else
    currentIndex = 1
  end
end

greenButton.ClickDetector.MouseClick:Connect(function() handleButton("Green") end)
redButton.ClickDetector.MouseClick:Connect(function() handleButton("Red") end)
blueButton.ClickDetector.MouseClick:Connect(function() handleButton("Blue") end)
Step 2 — Build the Finish pad
The final SpawnLocation past the puzzle wall. StageNumber = 11 is the win-pad sentinel every Roblox course in this series uses.
Build this partSpawnLocation (Finish — the win pad)
BlockOpen recipe
SpawnLocation (Finish — the win pad)
Block- Size
- 6 × 1 × 6
- Color
- Gold
- Material
- Neon
- Anchored
- ✓ Yes
- Place
- Behind where PuzzleWall_Back stood
Add StageNumber = 11. Check AllowTeamChangeOnTouch. Uncheck Neutral. Set TeamColor to Gold.
In Teams, insert a Team named Finished, TeamColor Gold, AutoAssignable unchecked.
Step 3 — Build the ExtensionPad boss arena
Behind the Finish pad, build the same ExtensionPad every Roblox course ends with — here it's the boss arena.
Build this partExtensionPad
BlockOpen recipe
ExtensionPad
Block- Size
- 30 × 1 × 30
- Color
- Bright yellow
- Material
- Marble
- Anchored
- ✓ Yes
- Place
- Behind the Finish pad — a large open arena to fight the boss in
Wide enough to dodge around the boss. This is where the final fight happens.
Step 4 — Build the victory wall and final room
At the far side of the ExtensionPad, a glowing wall blocks a small celebration room. Defeating the boss destroys it.
Build this partVictoryWall
BlockOpen recipe
VictoryWall
Block- Size
- 30 × 12 × 1
- Color
- Cyan
- Material
- Neon
- Anchored
- ✓ Yes
- Place
- Across the far edge of the ExtensionPad, blocking the final room
The boss script finds this by name and destroys it on victory. Leave it named exactly VictoryWall.
Build this partFinalRoom
BlockOpen recipe
FinalRoom
Block- Size
- 20 × 1 × 16
- Color
- Bright yellow
- Material
- Marble
- Anchored
- ✓ Yes
- Place
- Behind VictoryWall — the celebration room you reach by winning
Decorate the FinalRoom if time allows: banners, lights, a victory sign.
Step 5 — Build the boss
The boss is a scaled-up enemy. Three passes: build it, wake it, and make its defeat open the final room.
Pass 1 — Build the boss rig
- Avatar tab → Rig Builder → Block Rig → Insert. Rename it Boss.
- Place it in the middle of the ExtensionPad.
- Scale it up so it towers — select all its parts and use the Scale tool, or set the rig bigger, until it's clearly a boss.
- Select the Boss's Humanoid and set MaxHealth to
500and Health to500in Properties. - Select the Boss's HumanoidRootPart and check Anchored — the boss holds still until the fight starts.
Press Play. The boss stands in the arena with a health bar (your Stage 6 code gave it one automatically). It doesn't move yet.
Pass 2 — Wake the boss when the player arrives
In ServerScriptService, insert a Script named BossFight:
local Players = game:GetService("Players")

local boss = workspace:WaitForChild("Boss")
local humanoid = boss:WaitForChild("Humanoid")
local root = boss:WaitForChild("HumanoidRootPart")
local extensionPad = workspace:WaitForChild("ExtensionPad")

local DETECT_RANGE = 120
local ATTACK_RANGE = 9
local ATTACK_DAMAGE = 25

local started = false

local function startBoss()
  if started then return end
  started = true
  root.Anchored = false
  local lastAttack = 0

  task.spawn(function()
    while humanoid.Health > 0 do
      task.wait(0.3)
      local target, best = nil, DETECT_RANGE
      for _, player in ipairs(Players:GetPlayers()) do
        local character = player.Character
        local theirRoot = character and character:FindFirstChild("HumanoidRootPart")
        local theirHum = character and character:FindFirstChildOfClass("Humanoid")
        if theirRoot and theirHum and theirHum.Health > 0 then
          local dist = (theirRoot.Position - root.Position).Magnitude
          if dist < best then target, best = character, dist end
        end
      end
      if target then
        humanoid:MoveTo(target.HumanoidRootPart.Position)
        if (target.HumanoidRootPart.Position - root.Position).Magnitude <= ATTACK_RANGE then
          if os.clock() - lastAttack >= 1 then
            lastAttack = os.clock()
            local targetHumanoid = target:FindFirstChildOfClass("Humanoid")
            if targetHumanoid then
              targetHumanoid:TakeDamage(ATTACK_DAMAGE)
            end
          end
        end
      end
    end
  end)
end

extensionPad.Touched:Connect(function(otherPart)
  local player = Players:GetPlayerFromCharacter(otherPart.Parent)
  if player then
    startBoss()
  end
end)
Press Play. Walk through the finished obby (or move yourself onto the ExtensionPad). The boss wakes, chases, and hits hard. Fight it — its big health bar drains slowly because it has 500 health. It doesn't open the wall yet. Stop.
Pass 3 — Win: destroy the wall and reward everyone
At the bottom of BossFight, react to the boss's death:
local ServerStorage = game:GetService("ServerStorage")
local grantXP = ServerStorage:WaitForChild("GrantXP")

humanoid.Died:Connect(function()
  local victoryWall = workspace:FindFirstChild("VictoryWall")
  if victoryWall then
    victoryWall:Destroy()
  end

  for _, player in ipairs(Players:GetPlayers()) do
    grantXP:Fire(player, 500)
  end

  print("THE BOSS IS DEFEATED!")
end)
Press Play. Fight the boss to zero. The moment it falls, the cyan victory wall is destroyed, the final room opens, and every player gets 500 XP through the same GrantXP mailbox the loot uses. You defeated your own boss.
Understand it
The boss proves that a good game is systems reused, not features piled up. You didn't write a "boss engine." You took the Stage 7 AI, raised its health and damage, anchored it until the player arrives, and connected its Died to a wall and a reward. Every piece was already in your toolkit. That's how real games stay buildable — new content is mostly old systems, recombined.
Anchoring until the trigger is a small but real design choice. A boss that wanders the arena before you arrive looks aimless; one that holds still until you step onto its pad feels deliberate, like it was waiting for you. Unanchoring it in startBoss is the moment it "wakes."
Died is the win condition. The same event that dropped loot in Stage 8 and counted down the wave in Stage 9 here ends the game: destroy the wall, reward everyone. One event, three different payoffs across three stages — because you learned to hang meaning on it.
Publishing is the bridge from class project to real game. Until you publish, the boss lives on one laptop. After you publish, it lives on Roblox, and the URL on your billboard is how anyone joins the fight.
A boss is enemy AI, scaled and gated
The boss waits anchored until a player reaches the arena, then runs the same chase-and-attack loop as a normal enemy — and its death opens the final room.
local started = false

local function startBoss()
if started then return end
started = true
root.Anchored = false
-- (chase-and-attack loop, same shape as Stage 7's enemy)
end

extensionPad.Touched:Connect(function(otherPart)
local player = Players:GetPlayerFromCharacter(otherPart.Parent)
if player then
  startBoss()
end
end)

humanoid.Died:Connect(function()
local victoryWall = workspace:FindFirstChild("VictoryWall")
if victoryWall then
  victoryWall:Destroy()
end
for _, player in ipairs(Players:GetPlayers()) do
  grantXP:Fire(player, 500)
end
end)
Lines 1–7Wake once, then think.
The started flag makes sure the boss only activates once. Unanchoring it is the wake-up; the loop inside is the Stage 7 brain with bigger numbers.
Lines 9–14Trigger on arrival.
Stepping onto the ExtensionPad starts the fight. Same Touched + GetPlayerFromCharacter pattern you've used since Stage 1.
Lines 16–25Death is the win.
When the boss dies, destroy the victory wall to open the final room and reward every player through the GrantXP mailbox. The win condition is just a Died handler.
Publish the game
Save your file in Studio, then:
- Top menu: File → Publish to Roblox.
- Click Create New Game (or pick the existing one if you've published this file before).
- Name it something clear, like
My Combat Obby. - Description: one sentence, e.g.
A 10-stage combat obby with powers, enemies, and a boss. - Choose a genre such as Fighting or Adventure.
- Click Create / Publish.
After a minute your game has a URL like:
roblox.com/games/123456789/My-Combat-Obby
Build and update the billboard
In the FinalRoom, build a sign showing the link.
Build this partPlayBillboard
BlockOpen recipe
PlayBillboard
Block- Size
- 10 × 6 × 0.5
- Color
- White
- Material
- Neon
- Anchored
- ✓ Yes
- Place
- Standing upright in the FinalRoom
A SurfaceGui inside displays the game URL once you have one.
- Right-click PlayBillboard → Insert Object → SurfaceGui. Inside it, insert a TextLabel.
- Set the TextLabel Size to
{1, 0, 1, 0}and TextScaled to true. - Set its Text to your live URL, e.g.
PLAY: roblox.com/games/123456789/My-Combat-Obby.
Publish again so the live game includes the billboard.
Verify in the live game
- Visit your game's URL in a browser and click Play so Roblox opens it outside Studio.
- Confirm you spawn holding the sword with Level, XP, and Loot showing.
- Test the fireball (F), the turret, an enemy, and the arena wave.
- Reach the ExtensionPad, fight the boss, and confirm the victory wall is destroyed.
- Read the billboard in the FinalRoom and confirm the URL is right.
Test your stage
- Solve the puzzle in order: Green → Red → Blue. The back wall disappears.
- Touch the gold Finish pad; your XP increases.
- Step onto the ExtensionPad — the boss wakes and attacks with a big health bar.
- Defeat the boss with sword and fireball. The victory wall is destroyed and the FinalRoom opens.
- Every player receives 500 XP on the boss's defeat.
- Publish the game, put the URL on the billboard, and republish.
- Open the live game outside Studio and confirm the boss fight works.
- Design check. Is the boss a real fight — long enough to feel epic, short enough not to drag? Tune its health and damage until defeating it feels like a victory you earned.
If it breaks
- The boss never wakes. Confirm
BossFightis in ServerScriptService and the boss model is named exactlyBoss. The trigger is the ExtensionPad's Touched — make sure you actually stand on it. - The boss can't move. Its HumanoidRootPart is still anchored.
startBossunanchors it — confirm that line runs (it only runs once, guarded bystarted). - The victory wall doesn't disappear. It must be named exactly
VictoryWall. The script looks it up by name on the boss's death. - Publish to Roblox is greyed out. You're not signed in to Studio — sign in from the top-right.
- The live game still shows old content. You edited in Studio but didn't republish. Every change needs another publish.
- The puzzle wall won't open. Each button needs a ClickDetector, and the names must be exactly
Button_Green,Button_Red,Button_Blue.
Keep the capstone focused: assemble the boss from existing systems, then publish. Resist adding brand-new mechanics today — the lesson is reuse and shipping.
- The most powerful moment is realizing the boss is "just" the Stage 7 enemy turned up. Say it out loud; let campers find the Stage 7 code and compare.
- Publishing requires a signed-in account. Sort sign-in out before this session so it doesn't eat fight time.
- 70 minutes. Puzzle room 15, Finish + ExtensionPad + victory wall + final room 15, boss (3 passes) 25, publish + billboard + verify 15.
- The closing message: campers built a complete combat RPG — powers, enemies, AI, loot, leveling, a boss — and shipped it live. They didn't just play the hero; they coded the power.