Stage 6: Hidden Hazard Field
Make sure you've finished Stage 5: Fireball Footpath.
a wide field with hidden hazards
how transparency and placement create readable risk
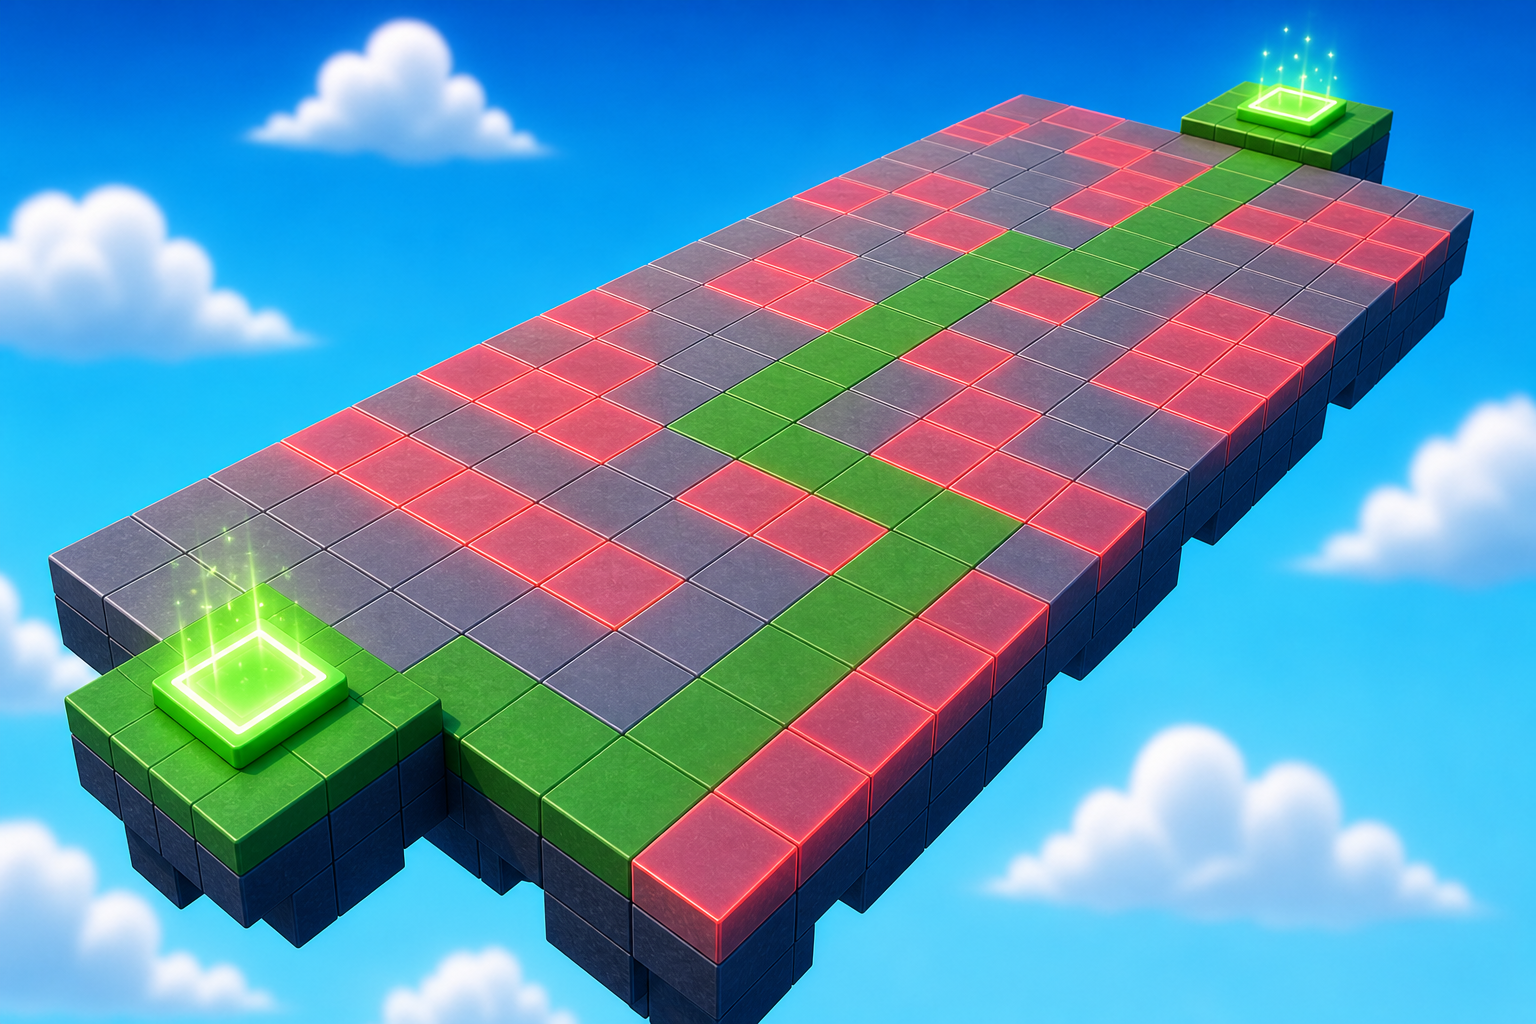
a hazard field with a safe path and checkpoint

Preview the hidden hazard field where the safe path is readable but not obvious.
Build this stage belowThe big idea
Stage 4's KillBricks were obvious — bright red, plainly dangerous. Stage 5's fireballs were timed but visible. Today's hazards are hidden: the same kind of danger, but the player has to look closely to find it.
The new design lesson is risk you have to read. A wide field with subtle hazards asks the player to slow down before they move. That moment of careful looking turns walking into observing — and observing is one of the most rewarding feelings a game can give a player.
The trick is making hazards visible enough. Completely invisible danger is just cheating the player. Faintly visible danger is fair — the player who looks will spot it, the player who rushes will pay. Difficulty and fairness are the same lever; you tune them together.
Today's hazard is a flat tile that blends into the field. We'll build the tile and paste in a tiny script that makes it dangerous on touch.
Build it
Step 1 — Build the hazard field
A wide flat field that gives the player room to choose a path. Players who look will find a safe route.
Build this partHazardField
BlockOpen recipe
HazardField
Block- Size
- 20 × 1 × 30
- Color
- Sand stone
- Material
- Sand
- Anchored
- ✓ Yes
- Place
- Right in front of the Stage 6 checkpoint, stretching forward 30 studs
Sandy or rocky textures help hide hazards in visual noise. A perfectly flat color would make faint hazards stand out like a sign.
Step 2 — Build a hidden hazard
A flat tile that sits just above the field. It uses the same color and material as the field so it blends in — the script will make it faintly transparent so a careful player can still spot it.
Build this partHazard_1
BlockOpen recipe
Hazard_1
Block- Size
- 3 × 0.2 × 3
- Color
- Sand stone
- Material
- Sand
- Anchored
- ✓ Yes
- Place
- On HazardField, somewhere in the middle area
Tile thickness 0.2 — just barely raised. Same Color and Material as the field for blending. The script will set Transparency = 0.85 so it's faintly visible.
Step 3 — Add the script that makes it dangerous
The script does two things: it makes the hazard faintly transparent at the start of Play, and it kills the player on touch. Right-click Hazard_1 → Insert Object → Script. Delete the placeholder.
Hazard_1
The Script lives inside Hazard_1. The script sets the hazard's transparency for you, so you don't need to change it in Properties.
local hazard = script.Parent

-- Faint enough to be risky, visible enough to be fair
hazard.Transparency = 0.85

hazard.Touched:Connect(function(otherPart)
  local character = otherPart.Parent
  local humanoid = character:FindFirstChildOfClass("Humanoid")
  if humanoid then
    humanoid.Health = 0
  end
end)
Press ▶ Play. Hazard_1 is faintly visible. Step on it — you respawn at the Stage 6 checkpoint.
Step 4 — Make more hidden hazards
One hazard isn't a field — it's a tile. Click Hazard_1 in Explorer, press Ctrl+D four or five times. Drag the Script from Hazard_1 onto each duplicate so they all become dangerous. Scatter them across the field, leaving at least one safe route a careful player could walk.
Press ▶ Play. Walk slowly. Read the field before you move.
Step 2 — Add the next checkpoint
Stage 7 checkpoint goes at the far side of the field. Same pattern as every checkpoint before this one.
2.1 Add another SpawnLocation
In Explorer, right-click Workspace → Insert Object → SpawnLocation.
2.2 Set its properties
- BrickColor → a new color.
- AllowTeamChangeOnTouch → checked.
- Neutral → unchecked.
- TeamColor → matches the BrickColor.
2.3 Tag it with its stage number
Same gesture as Stage 1. In the Attributes section of Properties, add a StageNumber attribute (number type) and set its value to 7.
2.4 Add a Team
- In Teams, insert a new Team named Stage 7.
- Uncheck AutoAssignable.
- Set TeamColor to match.
Drag the SpawnLocation onto the far side of your field.
Understand it
Transparency in Roblox is a number from 0 to 1. Zero is fully visible, one is fully invisible. The medium stretch sets hazards to 0.85 — almost invisible but with a faint outline. That gap between "invisible" and "almost invisible" is exactly where fair hidden hazards live. Set it to 1.0 and the danger is unfair. Set it to 0.5 and players spot it instantly. 0.85 is the sweet spot.
Wide spacing matters more than count. Twenty hazards on a tiny field is a punishment; five hazards on a wide field is a puzzle. The same number of dangers feels totally different depending on how much safe space sits between them. Game designers tune this by counting safe routes — if there's exactly one, the stage is unfair. If there are two or three, the stage is fair.
The theme of the field is doing real work too. We picked sand/rock textures because they're patchy — natural variation makes the faint hazard outlines blend in. A perfectly flat color would make 0.85 transparency stand out like a sign. The hazard hides in visual noise, not in nothing.
Try this
Try this
Three short experiments. Predict before you run, then test your guess.
Set one hazard's Transparency to 0.95. Predict: can you still see it? Walk over to where you placed it. Were you right? What does this tell you about how the human eye picks up faint differences?
Place a hazard out in the open — middle of the field, no nearby parts. Then place another tucked next to a similar-looking decorative block. Which one is harder to spot? Why?
Stage 7 has rolling boulders the player can see clearly. Look at your hidden hazards. What's fundamentally different about hidden hazards vs visible moving hazards? Which one is harder to design fairly?
Test your stage
Before moving on:
- Press ▶ Play and start from the Stage 6 checkpoint.
- Try one unsafe route and confirm the hazard works.
- Find a safe path across the field.
- Touch the Stage 7 checkpoint, reset, and confirm you respawn there.
- Design check. Stand still at the start of the field for 10 seconds. Without walking yet — can your eye pick out at least one hazard? If yes, fair. If no, raise the transparency.
If it breaks
- Players can see every hazard plainly. Your transparency is too low. Try
0.7or0.85instead of0.3. Higher number = more hidden. - Players can't see any hazards at all. Your transparency is too high (close to
1.0). Drop it to0.85— that's the standard "barely visible but findable" setting. - There's no safe path through the field. You placed too many hazards. Stand at the start, look across the field, and confirm with your eye that at least one route exists. If not, delete a hazard or two.
- The hazard doesn't hurt me. The Script is probably outside the hazard. In Explorer, the Script should be indented underneath Hazard_1. If you duplicated a hazard, drag the Script onto each duplicate.
- My Stage 7 checkpoint is the wrong color. Same debugging as earlier — check BrickColor + TeamColor + Team's TeamColor all match.